Heathkit IM 5248 Restoration Project
Experimenters, hobbyists, and pros alike have a fondness for classic Heathkit test equipment. WhitakerAudio has completed restorations on dozens of instruments, as catalogued on this site. All work like new, and look great.
This page documents one of the many restoration projects completed over the years to bring vintage test equipment back to life. Some projects involved little more than repainting the cabinet and running calibration/alignment steps. Other projects, such as this one, were much more involved—and expensive. The end results, however, were quite good.

The WhitakerAudio work bench is populated with vintage Heathkit test instruments, all of which have been cleaned, refurbished, and returned to new equipment specifications. Like many engineers (of a certain age), I started collecting Heathkit test equipment back in the 1970s and 80s. The instruments were available in kit form or assembled. The kit version was less expense, and building the instruments was a lot of fun. Over the years, as technology changed and jobs morphed from servicing equipment to designing it, the Heathkit collection dwindled. Several years ago, I began collecting Heathkit gear as a hobby (which took on a life of its own). Fortunately, the supply of used test gear on eBay (and elsewhere) is exceptional. The prices are usually reasonable and most of the equipment is in relatively good shape. Having said that, most pieces also need some amount of work to return to their original condition.
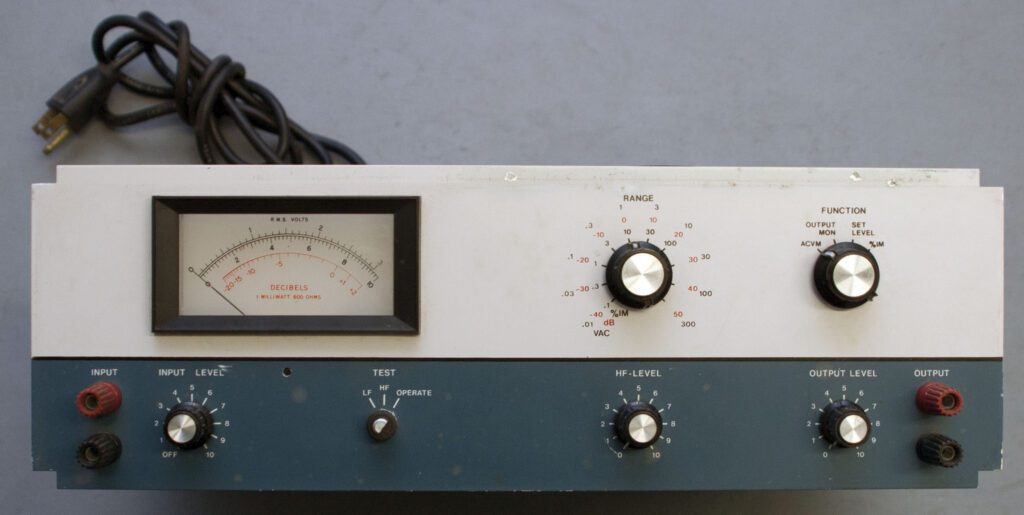
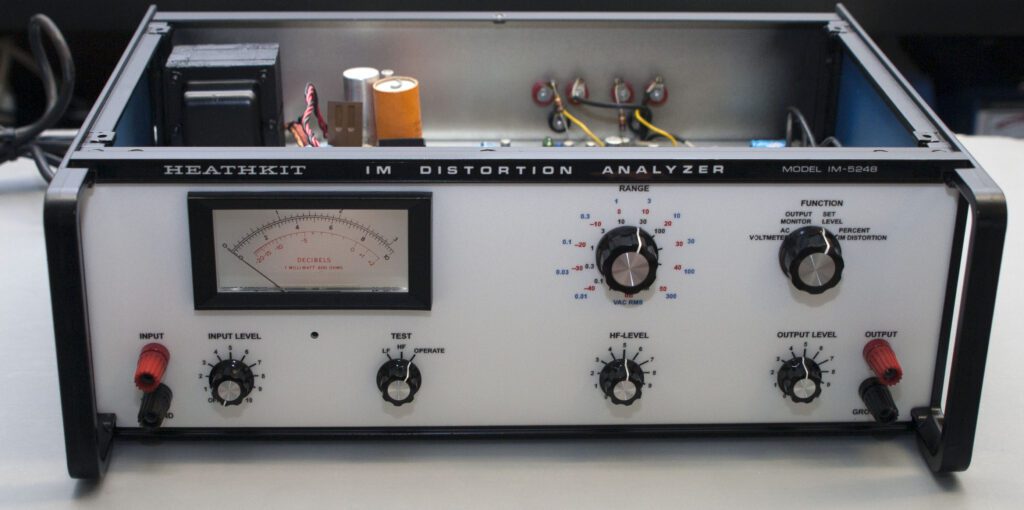
The starting point for the restoration project documented here was a rather beat up, Heathkit IM 5248 Intermodulation Distortion Analyzer, as shown above in the early stages of the project. This particular model was sold by Heathkit in the mid-1970s. The instrument uses discrete transistors, and for its day was a high performance piece of gear. Still is today, actually.
The problems with this instrument were largely the result of neglect. The analyzer worked, although there were some issues there as well. The greatest challenge was restoring the instrument to something approaching like-new condition, a requirement for the instrument making it onto the work bench.
Background – The eBay Purchase
The instrument, purchased off of eBay in July 2013, is identical to another IM distortion analyzer that I purchased a couple of years earlier. The new instrument, unfortunately, was in poor shape. Furthermore, I really had no need for two of these instruments—but I got it for a really good price. While not a particularly valid reason for buying something, it represented an interesting challenge. Furthermore, I rationalized the purchase by concluding that simultaneous IM measurements on the right and left channels of an amplifier under test would provide a good method of optimizing various operating parameters, notably amplifier output tube bias.
Like many purchases on eBay that are classified as “for parts or not working,” I spent more money on shipping than to buy the unit itself. When the instrument arrived, it was in about the shape I expected. An ample layer of dust and dirt covered the case, the paint was scratched up, and the front panel looked its age (40+ years).
Prior experience with test equipment restorations told me that the physical appearance of the analyzer case could be returned to its former self with only modest effort. The front panel, however, was quite another thing. Nearly all of the Heathkit test equipment built up until the late 1970s used silk-screened legends over a painted aluminum panel. Limited essentially to a damp, soapy cloth, it is very difficult to clean the front panel aggressively without removing paint and lettering as well.
Faced with a rather sad looking front panel, I decided to try updating the panel with a polycarbonate overlay. More about that later.
Day 1 – Assessing the Condition of the Instrument
The first step in the restoration project was to see where I stood with the instrument. The analyzer would power up, and it passed the “smoke test.” No further testing was done, although it was noted that the meter swung to mid-scale with no input. My operating assumption was a bad filter capacitor in the power supply. Whether the problem was that, or something else, it is very likely fixable without too much effort or cost. The Heathkit assembly manual is on hand, and most of the parts are relatively common.
Because the case required cleaning and refinishing, the top, bottom, and sides were removed. They were easily restored to like-new condition. Since I was planning on doing some serious work on the front panel, it was removed as well.
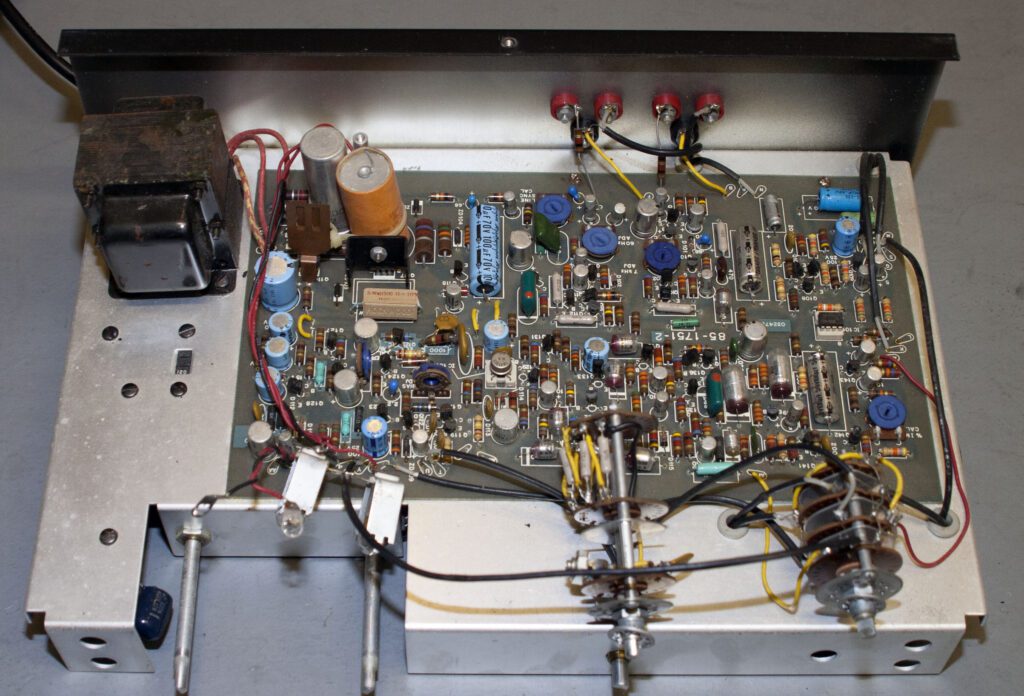
The top side of the chassis was dirty and the power transformer had evidently suffered some mechanical abuse.
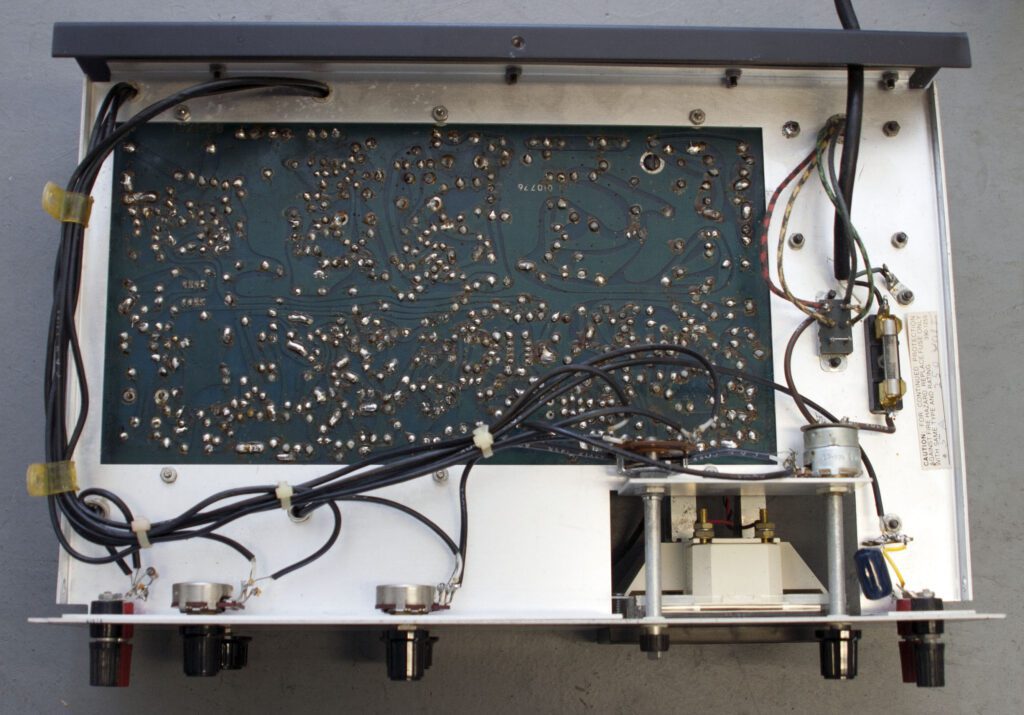
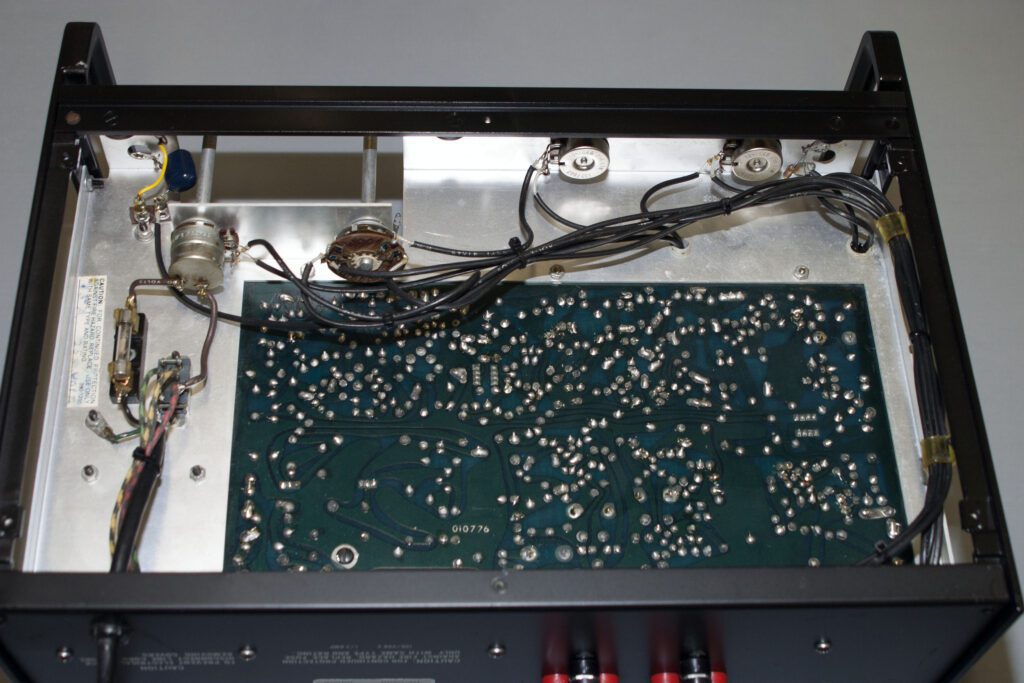
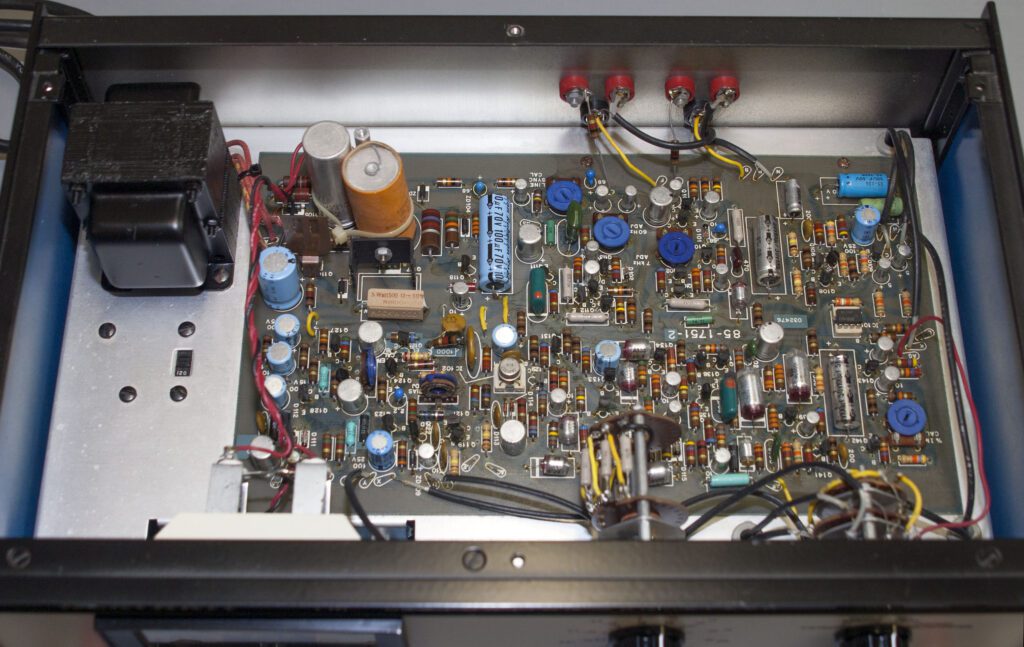
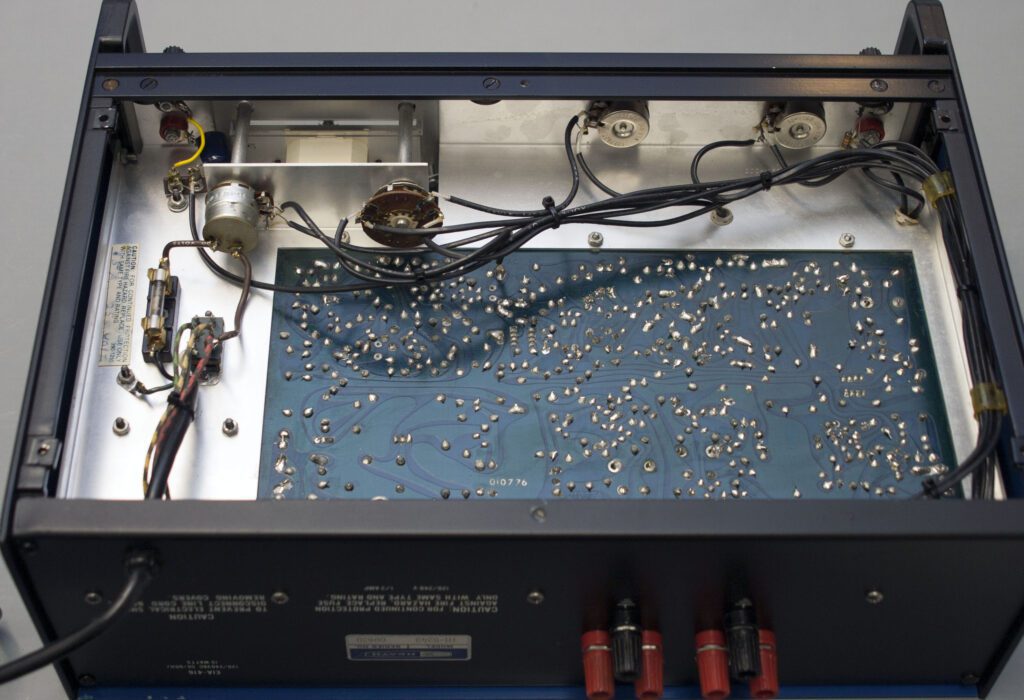
On the underside of the chassis, the circuit board and related wiring looked OK, although there was an enormous amount of solder flux on the board. (If there is ever a world-wide shortage of solder flux, it’s because of this circuit board!)
Based on previous experience, I did not see anything that couldn’t be fixed with some work. A check of components on the circuit board revealed no obvious failures (such as a leaky electrolytic capacitor). All of the switches and potentiometers were cleaned; they appeared to be in good electrical and mechanical condition.
The power transformer was removed for cleaning, and to repair the mounting tabs, which had been bent at some point in the past.
Even with the front panel removed, cleaning to anything approaching new condition was impossible. At this point, it was clear that in order to return this instrument to like-new condition, a new front panel would need to be produced.
Apart from the front panel, all other parts of the external case were in good condition, other than needing a coat of paint.
Day 2 – Cleaning the Chassis and Circuit Board
With the work plan being to take care of the easy items first, the top, bottom, and side panels of the instrument were cleaned and painted. While I have not been able to exactly match the “Heathkit blue” paint used on this instrument (and many others), I have been able to find a stock color that is close. And since I have repainted all of the dozens of Heathkit test instruments on my bench, they now all look the same, color-wise. The black trim pieces above and below the front panel were also painted, as were the two mounting side frames/handles. Here again, a stock paint was used. For reference, the colors are as follows: Rust-Oleum Gloss Enamel #7727, Royal Blue; and Rust-Oleum Satin #7777, Black.
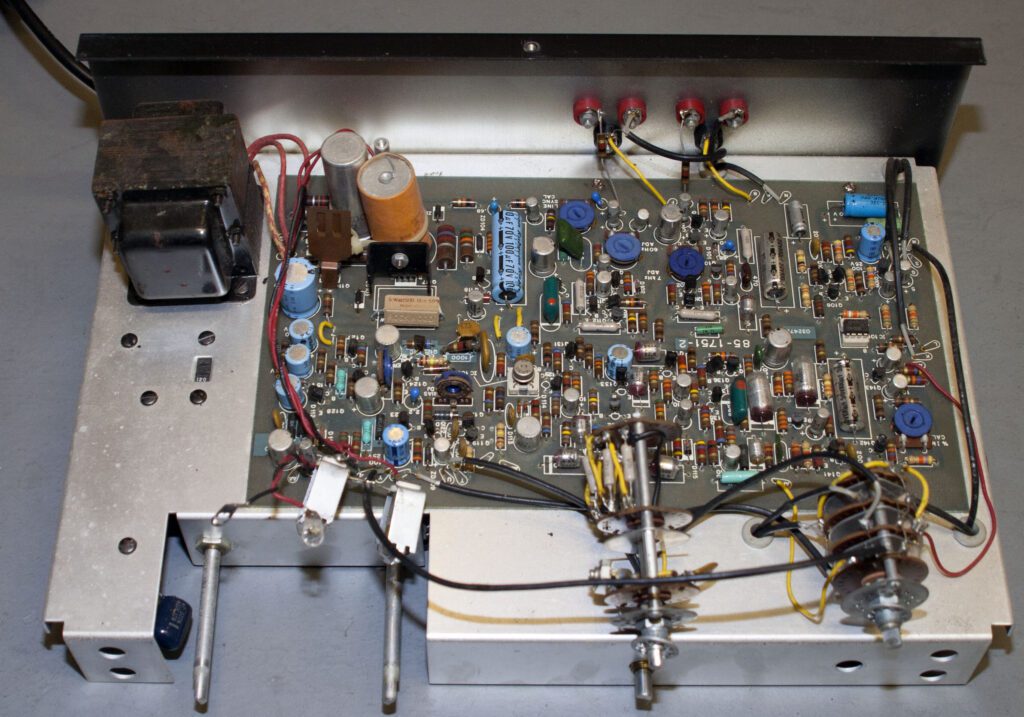
After some cleaning and painting, the IM 5248 was beginning to look pretty good.

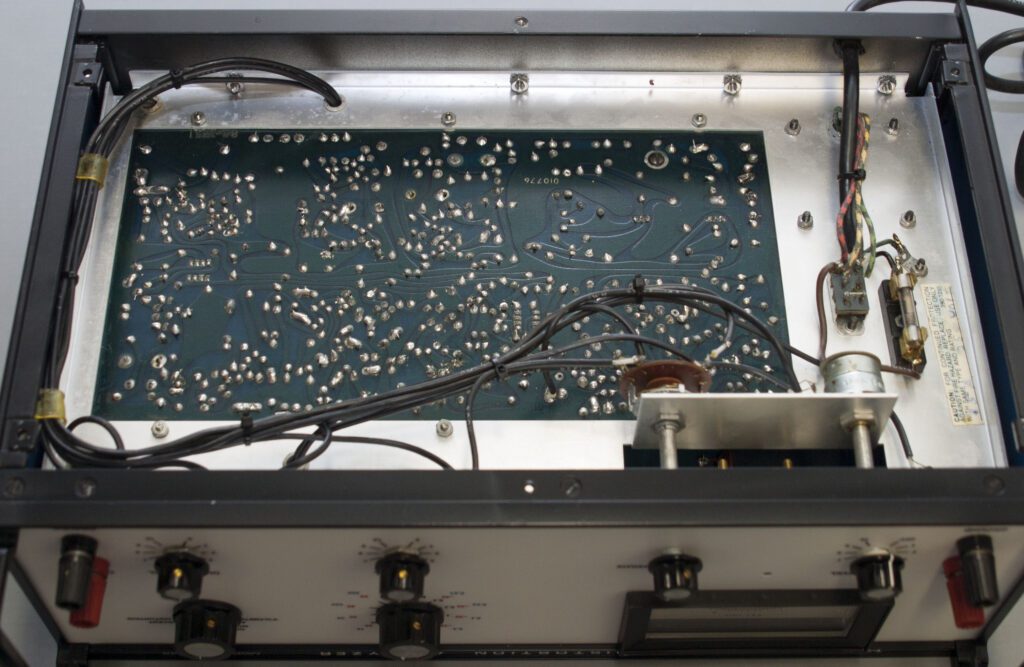
The foil side of the circuit board was cleaned with the help of generous amounts of flux remover. A combination of spraying and brushing successfully removed all of the old solder flux and left the board in like-new condition.
The flux remover used was MG Chemicals Flux Remover for PC Boards. There are two strengths available for this product—regular and heavy-duty. I used the regular strength.
The power transformer, which showed signs of rust in a few spots, was cleaned, repainted, and reinstalled on the chassis.
Day 3 – Remaking the Front Panel
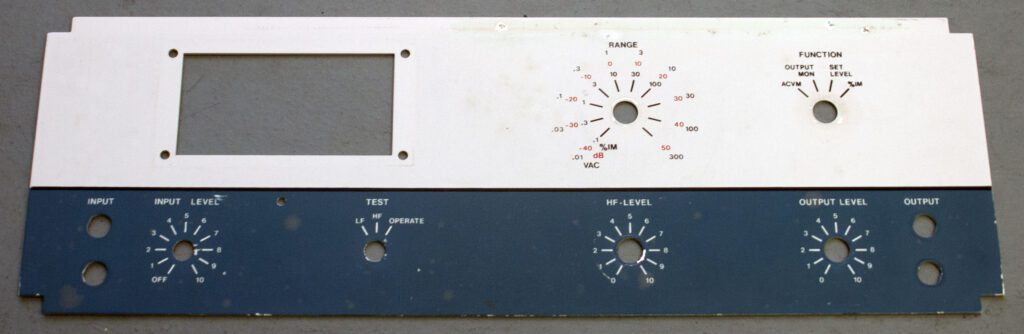
With the preliminary tasks largely completed, work began to replace the front panel legends with a polycarbonate overlay. The vendor chosen for this project was Metalphoto of Cincinnati (MPC). MPC offers a number of panel options. For previous projects, I have used a polycarbonate overlay. This material is a popular choice for applications requiring high mechanical strength. Such panels are easily die-cut and offer dimensional stability with resistance to corrosive chemicals, stains, heat, and abrasion. Polycarbonate overlays can be used as the front panel of a one-part panel overlay or two-part panel construction. For two-part construction, the polycarbonate overlay is affixed to an identically fabricated supporting metal panel. The IM 5248 project will use the two-part approach, with the overlay affixed to the existing aluminum front panel.
MPC takes a drawing file and produces the overlay from it. A number of formats are supported; I used Adobe Illustrator. Developing the file began with a scan of the original front panel. The size of the IM 5248 front panel exceeded the length of the flatbed scanner available, and so the panel was scanned in two passes, with the two images stitched together in Photoshop. The file was then imported into Adobe Illustrator for preparation of the overlay artwork.
The desired look of the front panel was a basic decision point. The obvious approach was to duplicate the look of the existing front panel, with the panel divided into two colors—white on top and blue on the bottom. An alternate approach would be to simply make the entire panel white in color, with black lettering and spot color on the legends as required.
There have been many styles and color combinations used for Heathkit test equipment over the years, as well as minor variations within basic styles. Focusing strictly on the “blue era” of the 1970s, the two major styles involved a white panel with a blue lower section (as used on the IM 5248, IM 5258, IG 1272, and others) and an all-white front panel (as used on the IG 1275, IM 5218, IG 1273, and others). The all-white front panel offered a more straightforward project and so the decision was made to dispense with the blue lower portion.
The scanned image was imported into Illustrator and and the needed elements were added. Illustrator (and other drawing programs) have the ability to create various layers and selectively show or hide them. With the the scanned image on one layer, text and graphic elements were added to other layers using the scanned image as a guide. When all of the new elements had been placed, the scanned image was hidden, or simply deleted.
With the Illustrator file ready to go, the job was shipped off to MPC.
Day 4 – Installing the New Front Panel
The polycarbonate overlay was installed today. Dimensions of the reproduction were very close to the original panel. A small amount of trimming was required, presumably the result of imprecision in stitching the two scanned images together, as discussed above.
The overlay is shown below prior to attachment to the panel. The overlay is very durable and because the lettering is etched from the adhesive side, the lettering will not wear off with use.

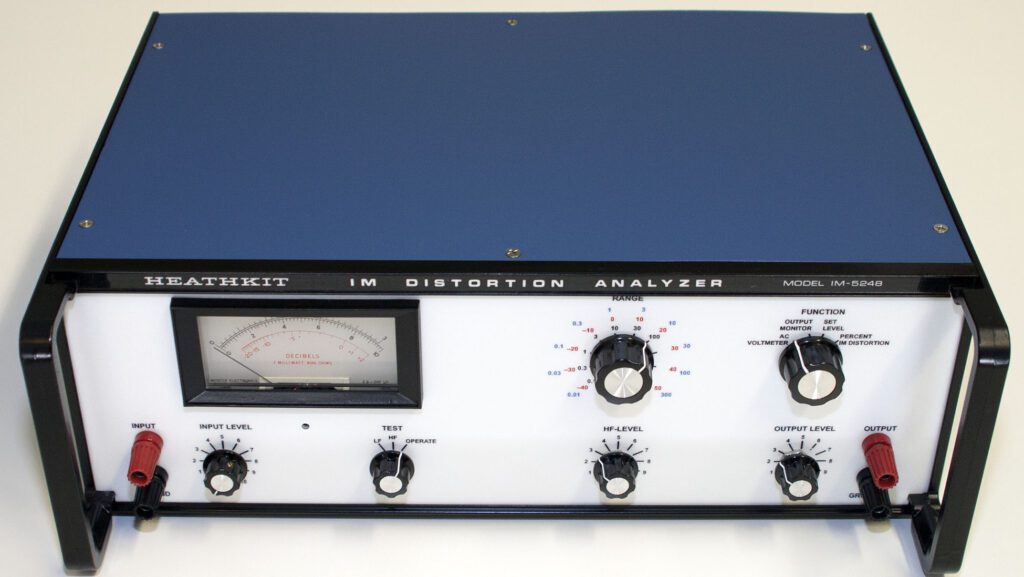
The assembled panel is shown below. New knobs were used on the panel as the old ones showed some amount of wear.
I am pleased with the decision to go with a white panel, rather than the white and blue color scheme of the original. While the all-white approach differs from the original Heathkit instrument, it is a simpler, cleaner look. And, as noted previously, a number of Heathkit instruments of the “blue era” used a plain white front panel.
With the panel reassembled, final clean-up work was done on the circuit board and chassis. All switches and potentiometers were cleaned. All electrolytic capacitors on the circuit board were inspected for signs of failure.
Mounting the meter was more difficult than expected due to the unique mounting arrangement. Fortunately, the assembly manual for the IM 5248 was on hand to help me remember how I got the instrument apart in the first place.

Despite the challenges of cleaning the circuit board, the finished product turned out quite well. Excessive solder flux seems to be a problem for some kit builders. It is possible that additional flux beyond that contained in a multi-core solder was used here. Back in the day, liquid soldering flux was commonly used to supplement the rosin core solder on tough jobs.
Regardless, the excess solder flux is gone now, and the board looks quite good.
A quick test of the instrument was done after reassembly. Although the test was not exhaustive, no obvious problems were observed. A complete recalibration is planned in the coming days.
Day 5 – Aligning the IM 5248
A complete alignment was run today on the analyzer. To my surprise, the unit tuned-up nicely, without the need for component replacement or other serious repair. One issue noted was the Input Level potentiometer, which is a bit noisy, but otherwise quite functional. I may end up replacing the device at some point; but for now, it is satisfactory.
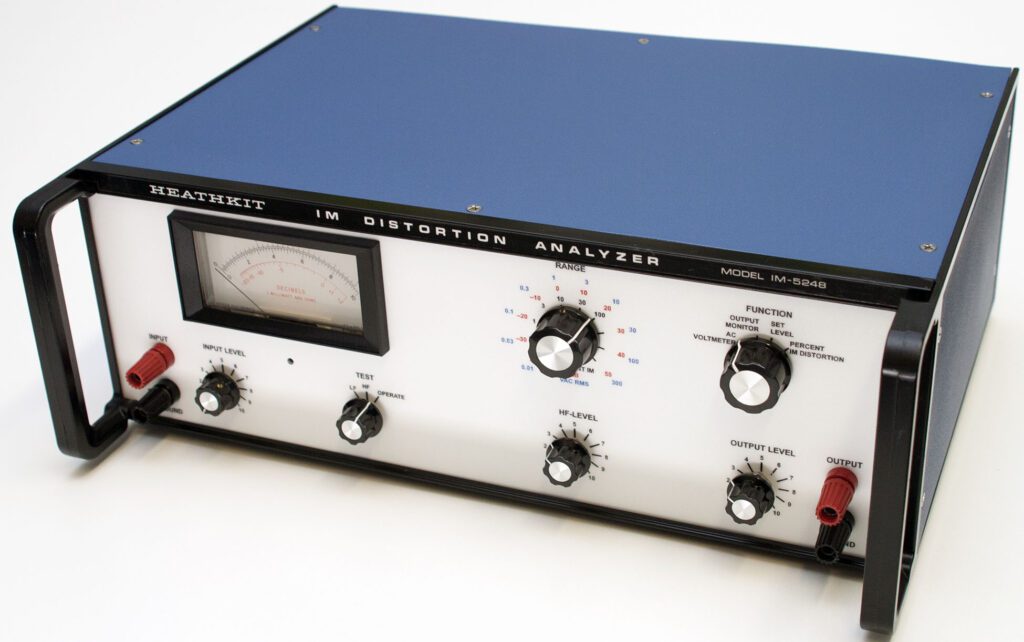
The completed unit is shown below. The Heathkit 5248 IM Distortion Analyzer has joined the work bench and is ready for use.
The project has now been finished. The cost was negligible, except for the polycarbonate overlay. In very small quantities (4 units in this case) the cost from MetalPhoto was about $275. Since I have another IM 5248 that I will be rebuilding, the cost was not excessive since I can spread it out over two projects.
Day 6 – Cabinet Refinishing
A chance conversation with a friend and colleague got me thinking about how I could improve the look of the cabinets of the instruments that I have refurbished. My friend, a collector of classic ham radio gear, said he found a vendor to powdercoat the cabinets of his radio sets. Doing some investigation, I found a local vendor who would take the cabinet parts, sand them to bare aluminum, and apply the powdercoat.
The powdercoating process uses a solvent-free dry mix of plastic resins, pigments, and fillers that melt and fuse together when heated. The solid particles of coating are electrostatically charged in a spray gun and carried by low velocity air to the surface of the work piece. The electrostatic charge holds the powder particles in place while the part is cured in a high-temperature oven. The heat causes the powder to cure, creating a highly durable finish.
There are several vendors providing a wide variety of color powders for this process. Prismatic Powders is one such vendor. When considering colors, it is best to work from a paint chip chart, rather than a computer screen (which may or may not be color-accurate). For this project I chose a color sample that appeared close to “Heathkit blue.” Once applied to the case, the color turned out to be quite close to the original color. The powder mix was available in a smooth gloss finish or a textured semi-gloss finish. I decided to go with the texture, which was similar to most (but not all) Heathkit finishes.
While I had the cabinet apart, I decided to replace the rubber adhesive feet used on this instrument (and countless other Heathkit instruments) with something a little more robust. I chose four nylon feet, 3/4-inch in diameter, and mounted with a #6 screw and nut. This is a much better approach than the rubber feet.
Final Thoughts
Readers will quickly recognize that the finished product bears only a passing resemblance to the original Heathkit IM 5248. I’m fine with that, as the objective here was to dress up the instrument and return it to like-new condition. It is fair to note that “restoration” implies being true to the original appearance of the product. Readers who subscribe to that objective can, of course, use the techniques given here to produce an end result that looks like the 1970s-era instrument.
Different people have different objectives. If a project meets the objectives of the builder, then by definition it was successful.
The Heathkit IM 5248 analyzer has now been finished and placed into service. Project completed.
A number of other restoration projects have been completed on various Heathkit instruments using the techniques described here. See the Heathkit Refurbishment Gallery blog.