1970s Era Radio Production Room
This blog describes the implementation of a 1970s-era FM radio station production room done by WhitakerAudio using the Gates Executive Audio Console as the centerpiece of the studio. The project is “Part 2” of the 1970s radio station described in the web page of the same name.
The following equipment is used in the Studio Three Production Room installation:
- Gates Executive Audio Console with WA-6034 preamplifiers, WA-5800 program amplifiers, WA-6108 power amplifiers, audition channel VU meter option, WA-6205 dc power supply, and WA-6204 ac power supply.
- Shure SM7B microphone connected to Channel 1 (operator position).
- Harris CB1201 turntable with Shure M232 tone arm and Shure M4407 cartridge.
- Technics SL-1200MK3D turntable.
- ITC RP record/playback stereo cart machine.
- ITC PD-II record/playback mono cart machine (for encoding program commands for the Studio Three automation system).
- Ampex AG-440 reel-to-reel audio recorder with remote control.
- WhitakerAudio 40 W Stereo Power Amplifier.
- Electro-Voice Sentry 100A studio monitor speakers.
- M-Audio powered speakers for external cue monitoring.
- AKG K240 headphones.
- CBS Labs 4500 Dynamic Presence Equalizer.
- WA-6010 Machine Remote Control.
- WA-6033 Phono Preamplifiers.
- WA-6204B ac power supply.
- Sigma Designs stereo distribution amplifier.
- Samson S-MAX MCD2 pro 2-channel passive PC direct box.
- Audiolab Electronics TD1 tape eraser.
- AudioSource AM/FM stereo tuner.
In a radio station, the production room is where announcers record commercials and other program elements for playback in the main (on air) studio. For medium-or small-market stations of the 1970s, the production room was usually of minimal design—just what was needed to get the job done. My recreation of a production room will follow that practice.
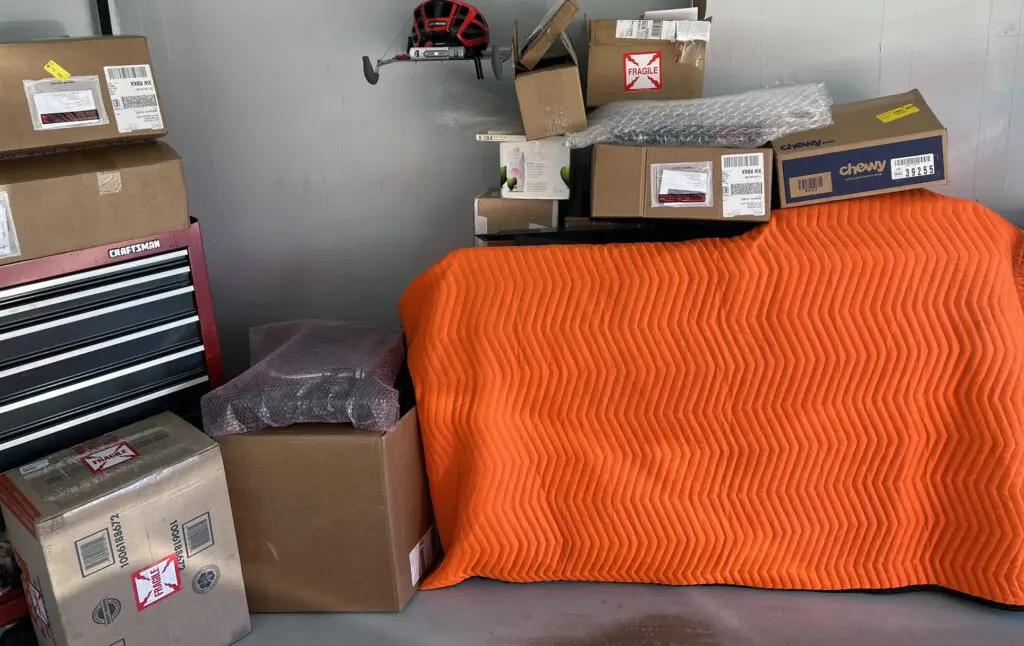
Like all of my restoration projects, this one begins with a collection of boxes, most (well, all) from eBay purchases.
The hardware will be cleaned, refurbished, and checked one unit at a time. Most of the work will focus on the Executive audio console. I have already done two restoration projects on the Executive console, so I have a good idea what to expect. (See Gates Executive Audio Console Restoration, Part 1, Part 2, and Part 3.)
The production room is simple in design—just the basics. A line drawing of the planned installation is available here.
The entries below document major steps in turning the boxes of stuff from eBay into a working 70s-era production room.
CBS Labs 4500 Dynamic Presence Equalizer
The 4500 is an interesting device. The origins of this audio processor date back to the late 1960s. In a paper delivered to the Audio Engineering Society (AES) in 1969, the authors (R. Allen, E. Torick, and B. Bauer) describe the predecessor of the 4500 (the CBS Labs 450) as follows: “A new automatic speech processing device … whose function is to correct deficiencies in speech program caused by inadequate energy in the presence band. The relative amount of total energy in the presence band is determined and if deemed inadequate, the amplitude of the presence band is boosted until an optimum spectral distribution is obtained. An automatic Speech/Music Discriminator inhibits action during music programming.”
The 450 (and 4500) were intended—initially at least—for AM radio applications, where high end frequency response is quite limited. The Dynamic Presence Equalizer (DPE) was designed to improve voice intelligibility for such applications. It was typically installed at the output of the on-air program chain. A CBS Labs processing setup would consist of the 4450 Audimax level controller feeding the 4500 Dynamic Presence Equalizer feeding the 4110 Volumax peak clipper. The output of the Volumax was delivered to the studio-to-transmitter link (STL) or directly to the local transmitter.
The 4500 purchased on eBay arrived in OK shape—about what I expected. After some work on the power supply and general cleanup, it began looking rather nice.
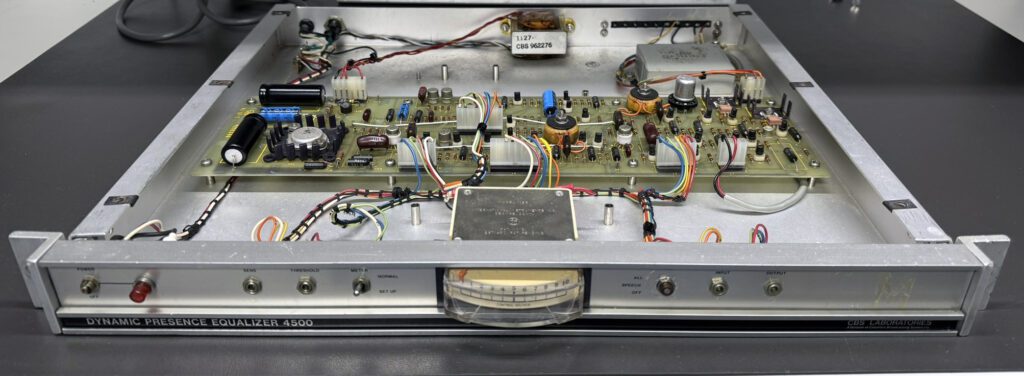
Initial measurements showed good performance of the unit in the test (equalization bypass) mode. Additional tests and adjustments were conducted after finding a maintenance manual online.
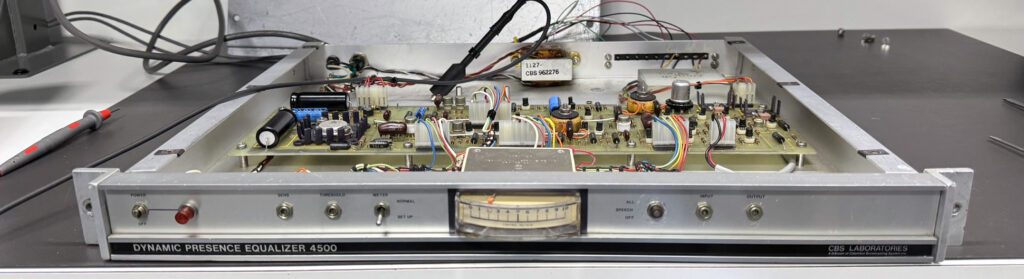
I did not have a 4500 in the 1970s era radio studio documented on this site, but I always wanted one…
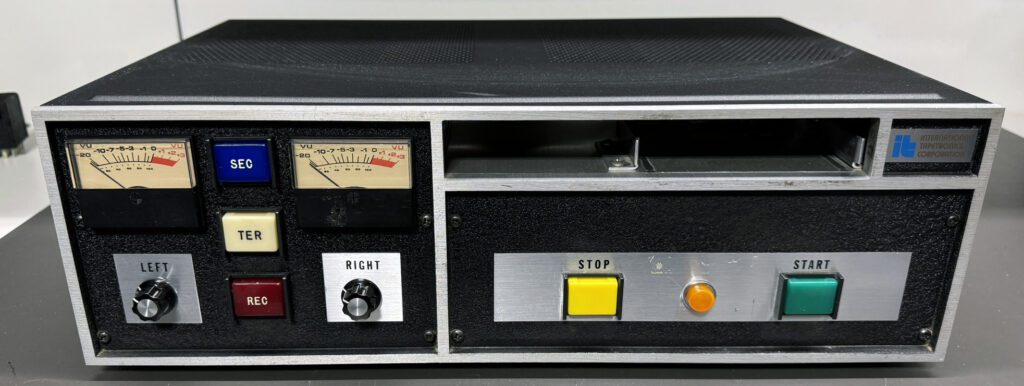
ITC RP Cart Machine
This cart machine was a great find on eBay. The ITC RP series is a very well built machine, and the unit purchased on eBay was in excellent condition. Very little work was required to bring the RP back to life—mainly a thorough cleaning and alignment. The cabinet was refinished in a satin black power coat, which matches the rest of the hardware in the studio.
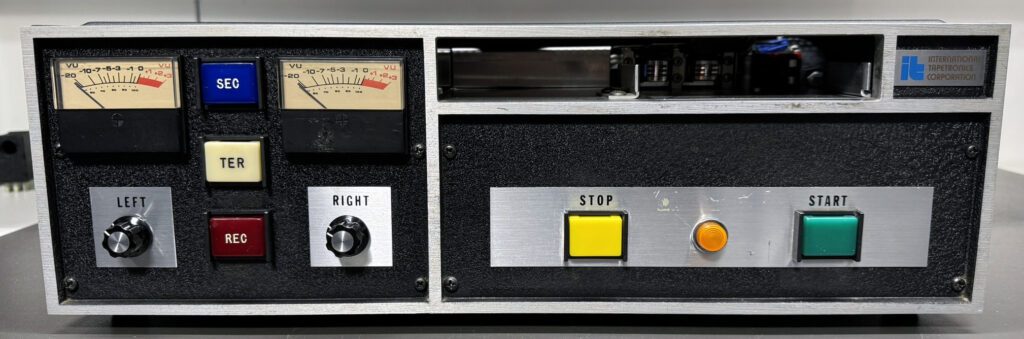
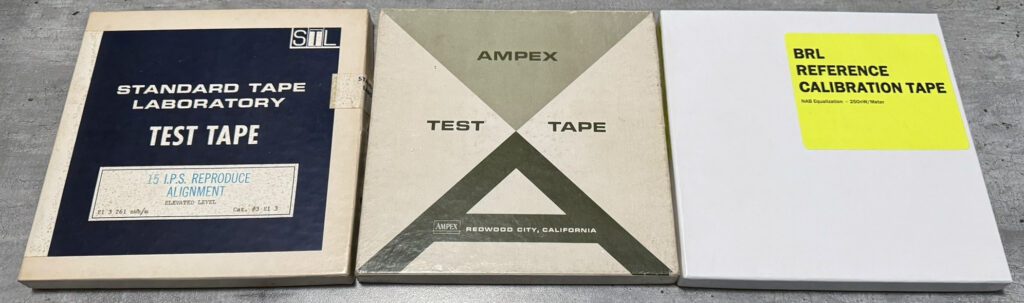
The modular design of the RP makes servicing relatively easy. Most adjustments are possible with the protective covers in place. Head alignment is shown in progress in the photo below. Standard reference test tapes are essential for alignment, and fortunately STL (Standard Tape Laboratory) alignment tapes were found on eBay.
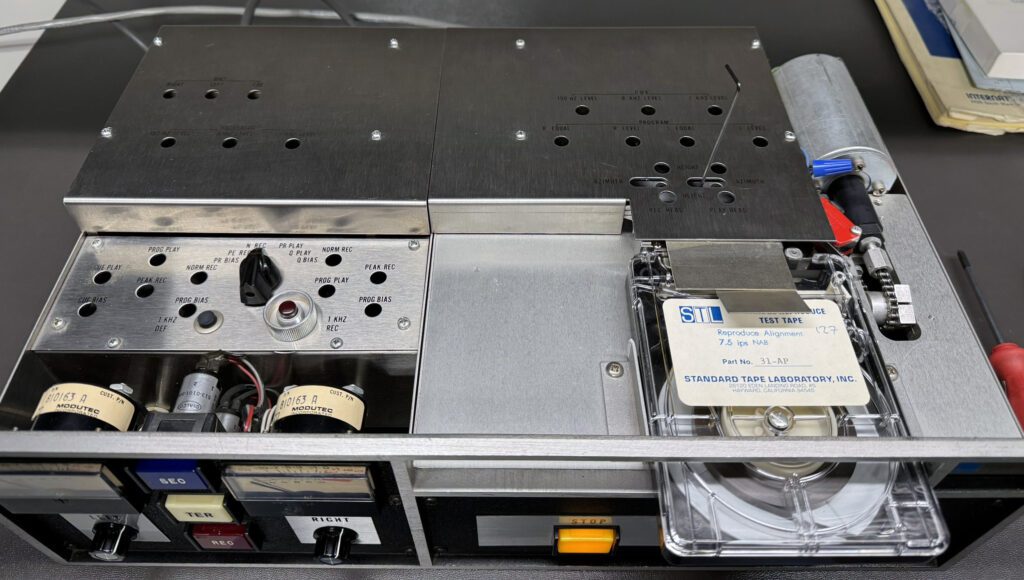
The cart machine tuned-up very well, meeting the original equipment specifications for frequency response of +/– 2 dB from 50 Hz to 15 kHz. That’s quite an accomplishment for a 40 year old machine (and 40 year old tape).
Tape cartridges must first be erased prior to use, of course. That requires a tape eraser. A fortunate find on eBay was the Audiolab Electronics TD1, a classic device used in countless 70s and 80s radio studios.
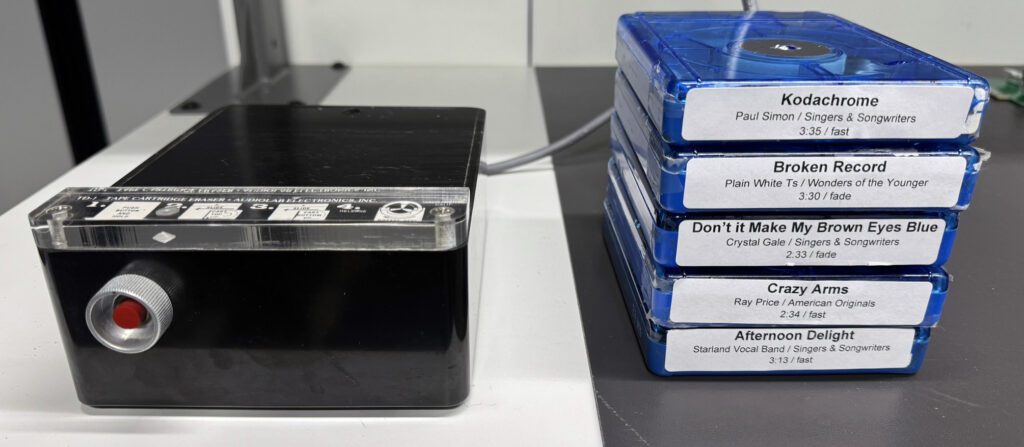
A selection of new and used tape cartridges was also purchased on eBay. All needed to have their head pads replaced, which was accomplished through an order from 8 Track Avenue, which offers new cartridge pads for a number of machine types. After cleanup, the cartridges performed remarkably well considering the age of the tapes.
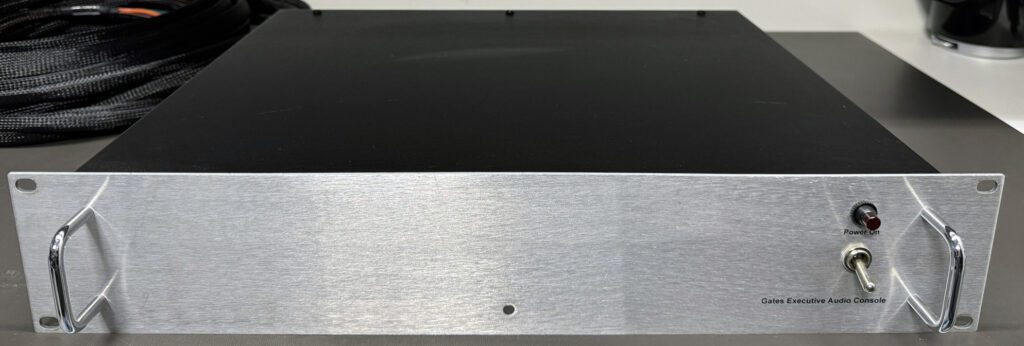
Gates Executive Audio Console
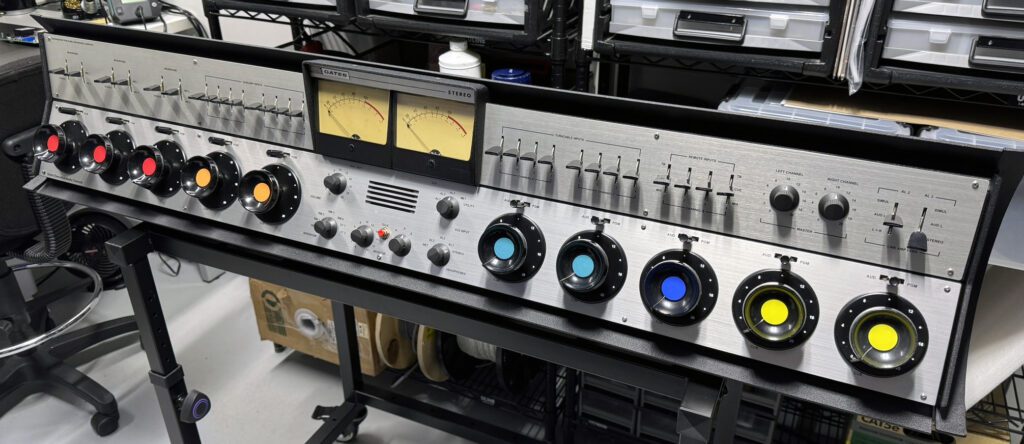
As mentioned above, the Gates Executive console is the centerpiece of the production room. The process for refurbishing this type of console has been documented elsewhere on this site and so it will not be repeated here. (See Gates Executive Audio Console Restoration, Part 1 and Part 2.) Instead, I will focus on the finished product.
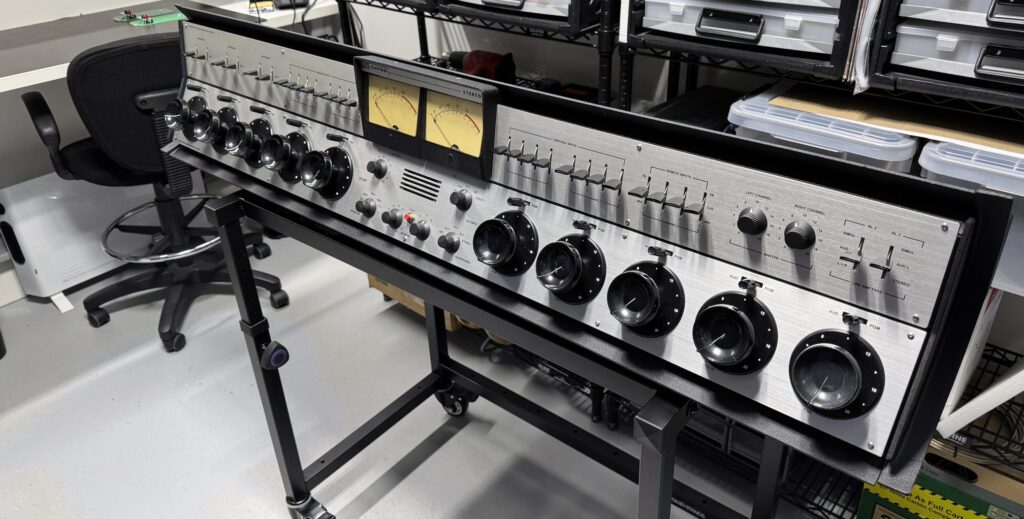
The console is shown above in the shop, The cabinet was refinished and the front panel remade. With the exterior completed, work shifted to internal components.
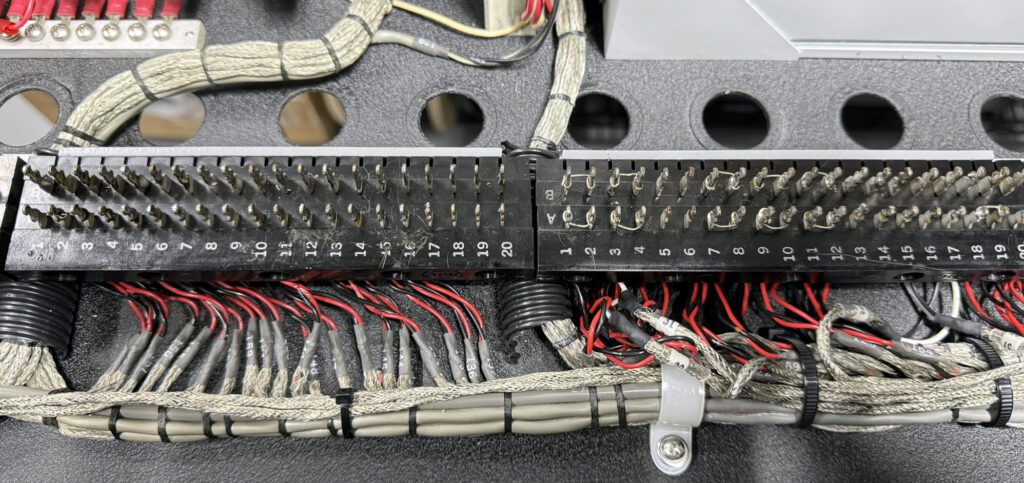
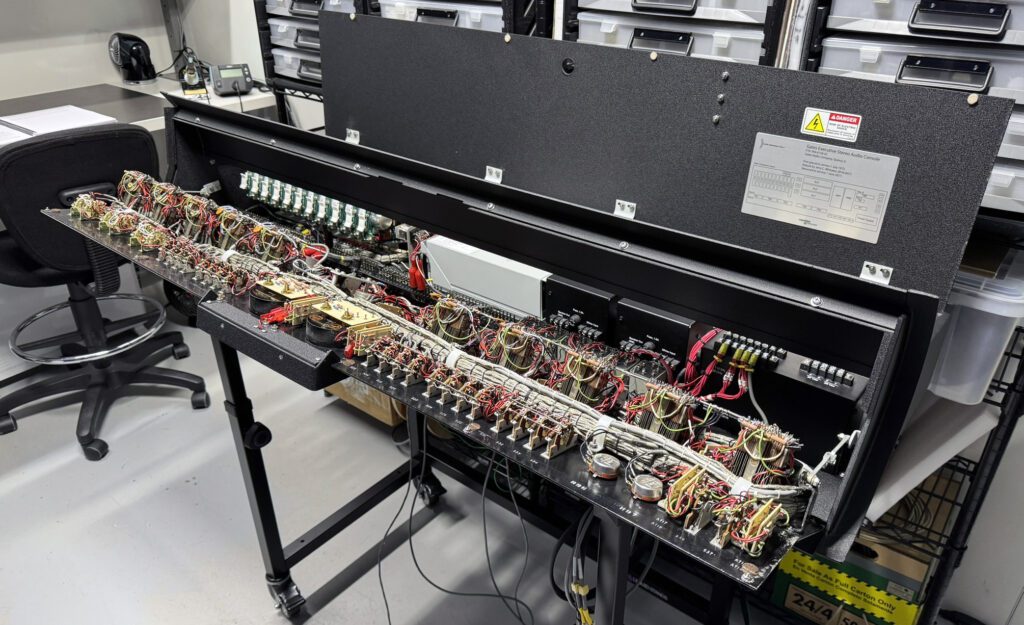
The first step in refurbishing the inside of the console was to clean the terminal blocks used to interface the console with external equipment. As shown below, the terminal blocks cleaned up nicely after removing the old connections and excess solder.
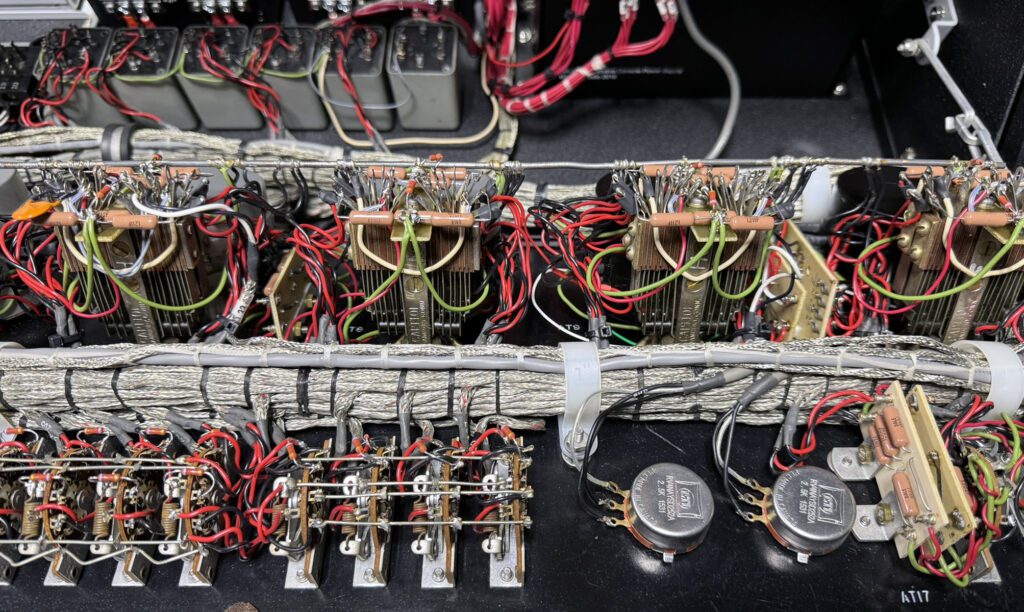
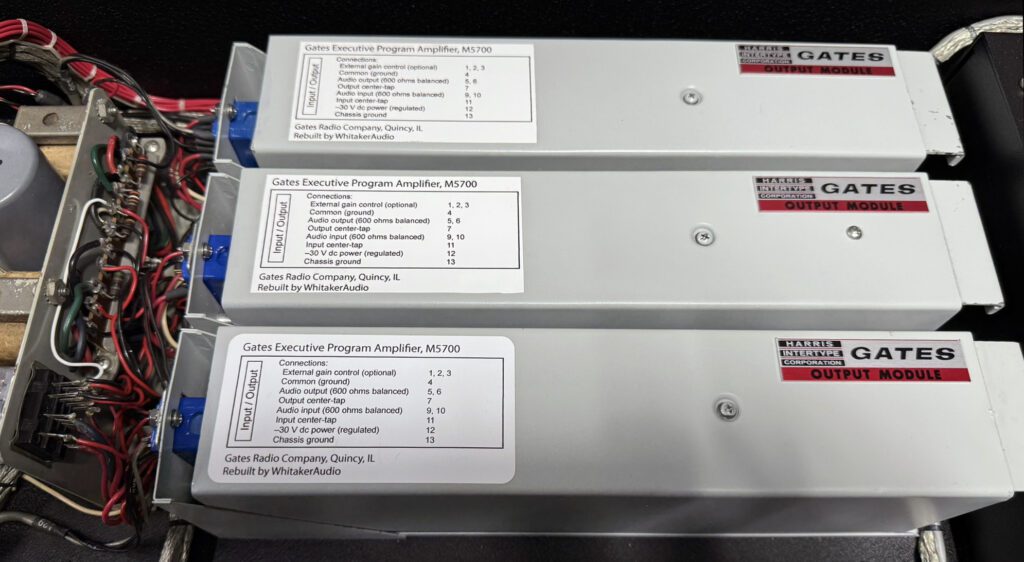
The Program/Audition line amplifiers were removed, cleaned, and checked. The monitor amplifiers were not provided with the console and so they were remanufactured, as detailed in other postings. (See the links above.) The finished installation is shown in the photo below.

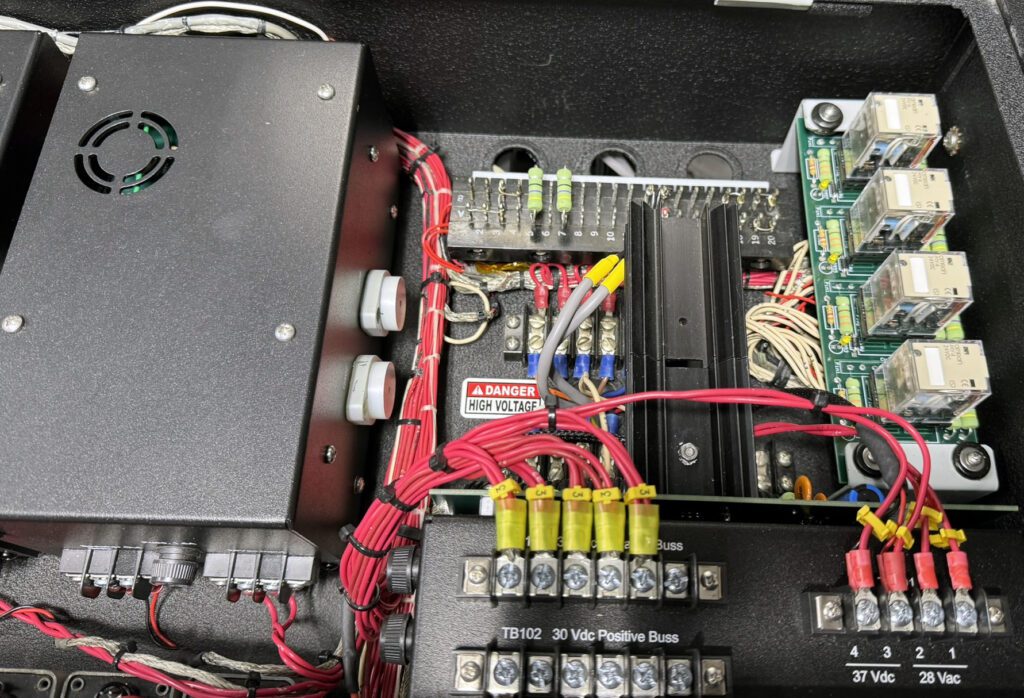
The power supply and relay panel were also reproduced, with the final result as shown below.
Wiring on the front panel was cleaned up as needed. Over the years, some modifications had been made to the microphone input switches. Those were returned to the as-designed state. Several of the front panel switches were replaced because repair was problematic.
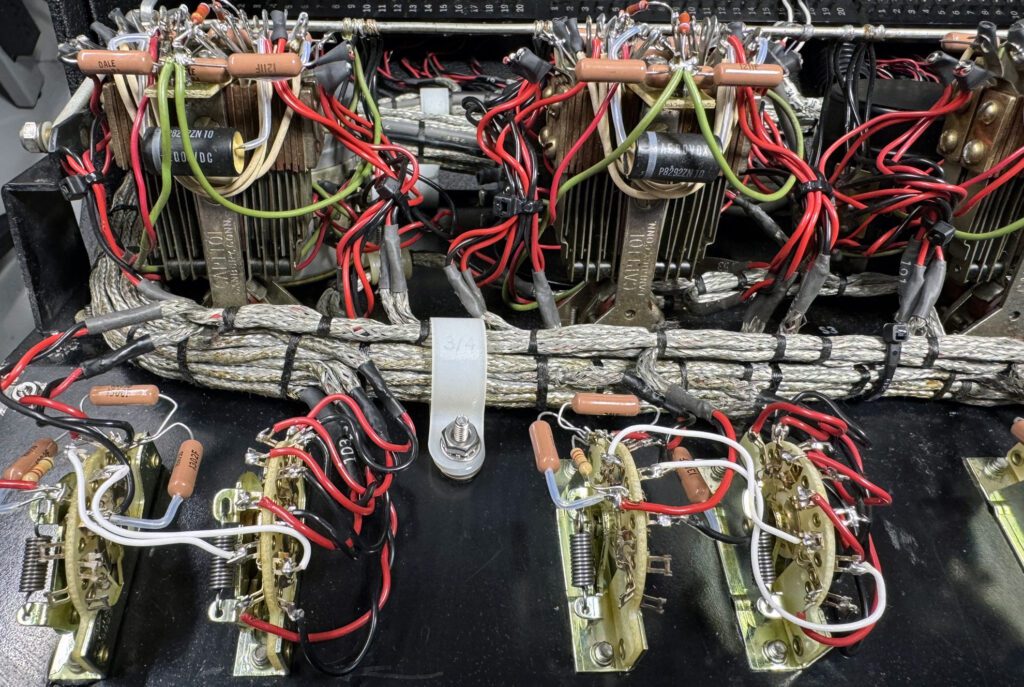
The Executive console includes a number of resistors associated with the channel input switches. These resistors maintain input levels as channels are switched in or out of the Program/Audition busses. Over time these carbon composition resistors tend to change value—usually toward a higher resistance. This can cause levels to change when a particular channel is switched on to the buss. The fix is to replace the resistors with modern 1% tolerance devices, as shown below.
Previous experience with the Program/Audition line amplifiers demonstrated that the interface connectors may deteriorate with age. The connectors were, therefore, replaced with NOS devices.
Many Executive consoles included colored dots on the front panel channel faders in order to group functions, such as microphone, auxiliary, turntable, etc. inputs. In a chance find on Amazon.com, colored inserts were found and applied to the fader knobs, as shown below.
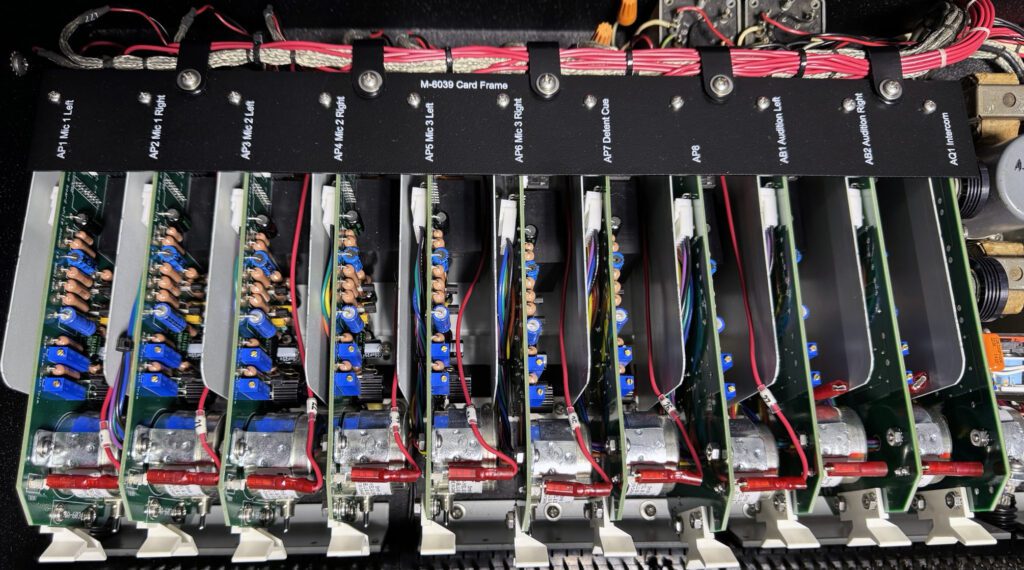
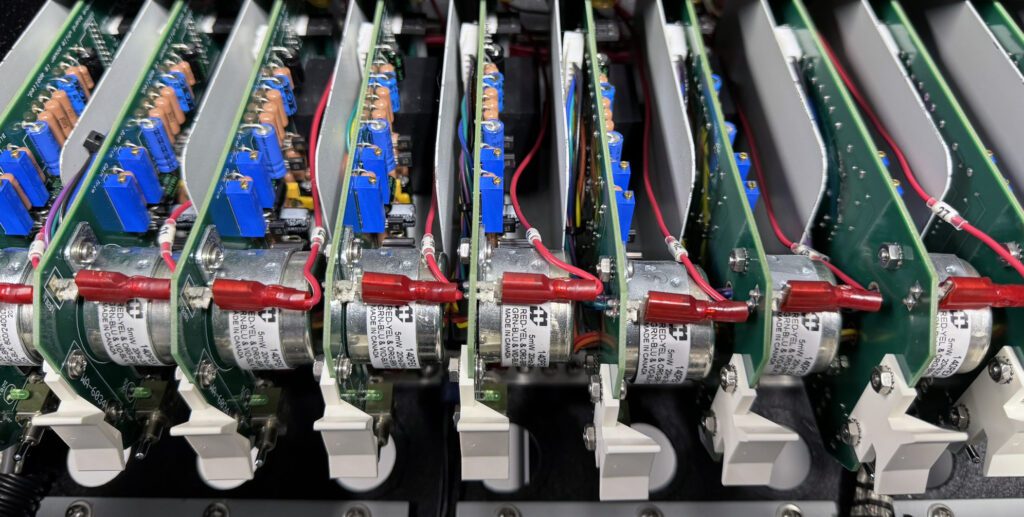
Some of the circuit boards in the Executive console card frame were missing and others were in need of repair. As described in other posts (linked above), replacement preamplifier and cue amplifier PCBs were produced and installed, as shown below. Note also the card frame label panel that was added at the rear of the frame to show the function of each PCB.
The replacement boards are similar to the original PCBs used in the console, but using modern components.
One improvement on the original design is the option for a balanced output from the preamplifier boards. This makes it practical to implement send/return lines for the microphone channels, which allow insertion of external side-chain processing gear.
Power for the Executive console is provided by three 28 V ac transformers mounted external to the console. One transformer supplies ac input to the console dc power supply, and the other two supply ac input to the left and right channel monitor amplifiers. The transformers are mounted in the rack assembly shown below.
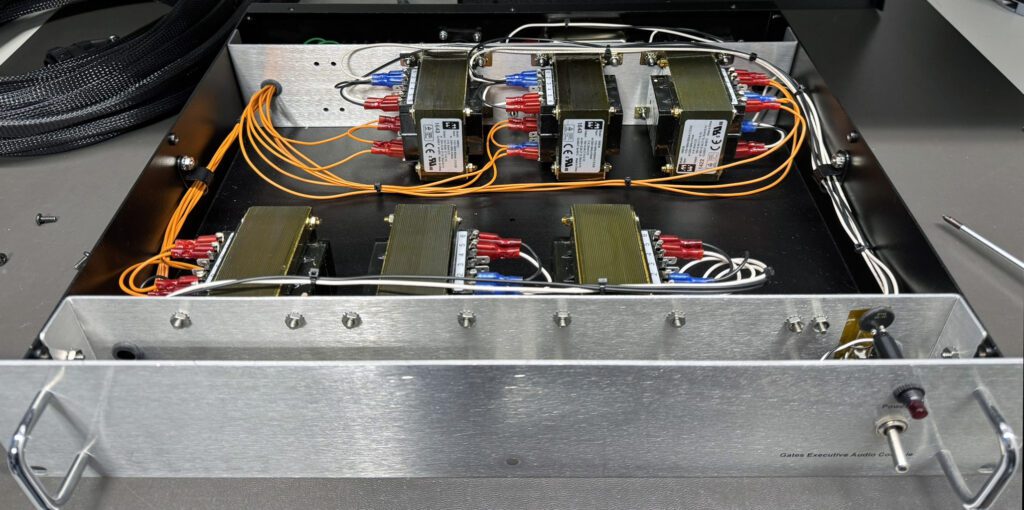
The front panel of the ac power supply was designed to match the style of the Executive audio console.
Executive Console Bench Tests
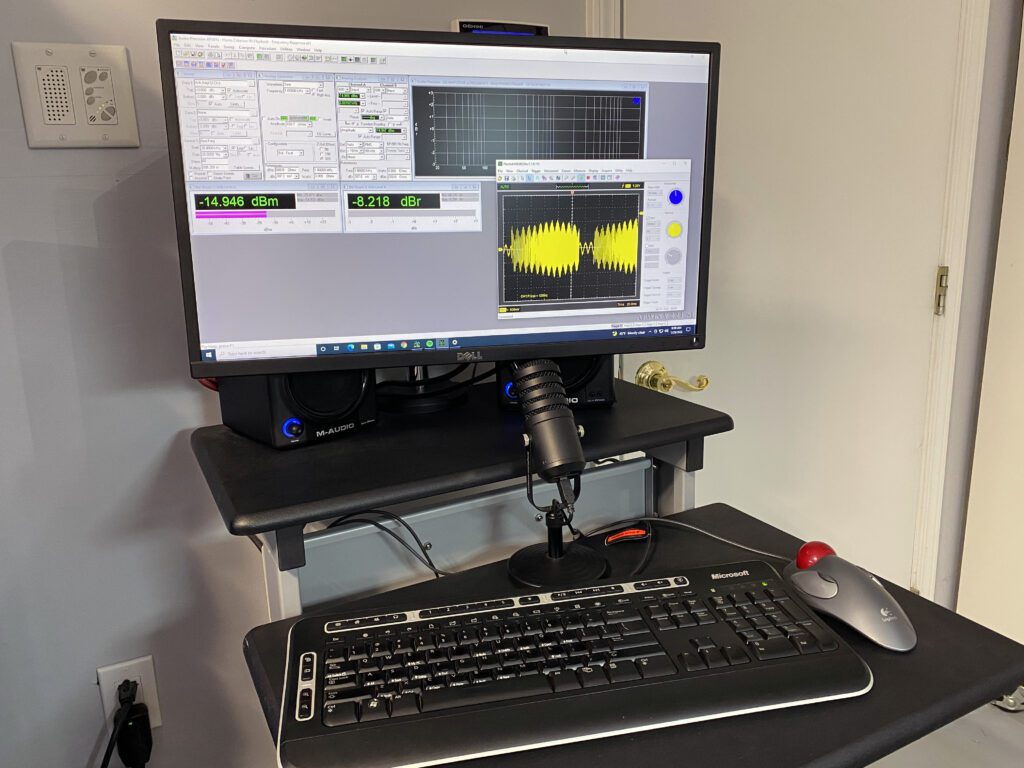
Before installing the Executive audio console and other equipment in the new production room, a full series of tests and measurements were run. The measuring device was an Audio Precision System One automated test set. Results were documented to ensure operation within the new equipment specifications, and as a reference point for future maintenance that may be required.
All mixer inputs were tested and results documented for all signal paths available within the console, including:
- Microphone input to Program output
- Microphone Mono input to Program output
- Auxiliary input to Program output
- Auxiliary input to Audition output
- Auxiliary input to Cue output
- Auxiliary input to Monitor output
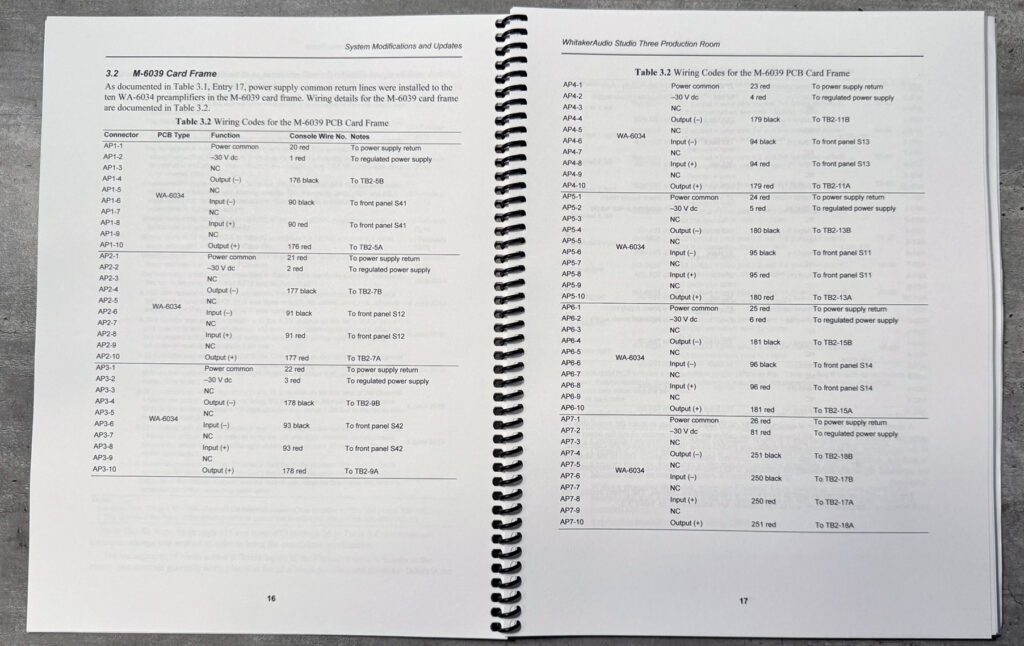
As with the other projects described on this site, the Studio Three Production Room was documented in a comprehensive user/maintenance manual.
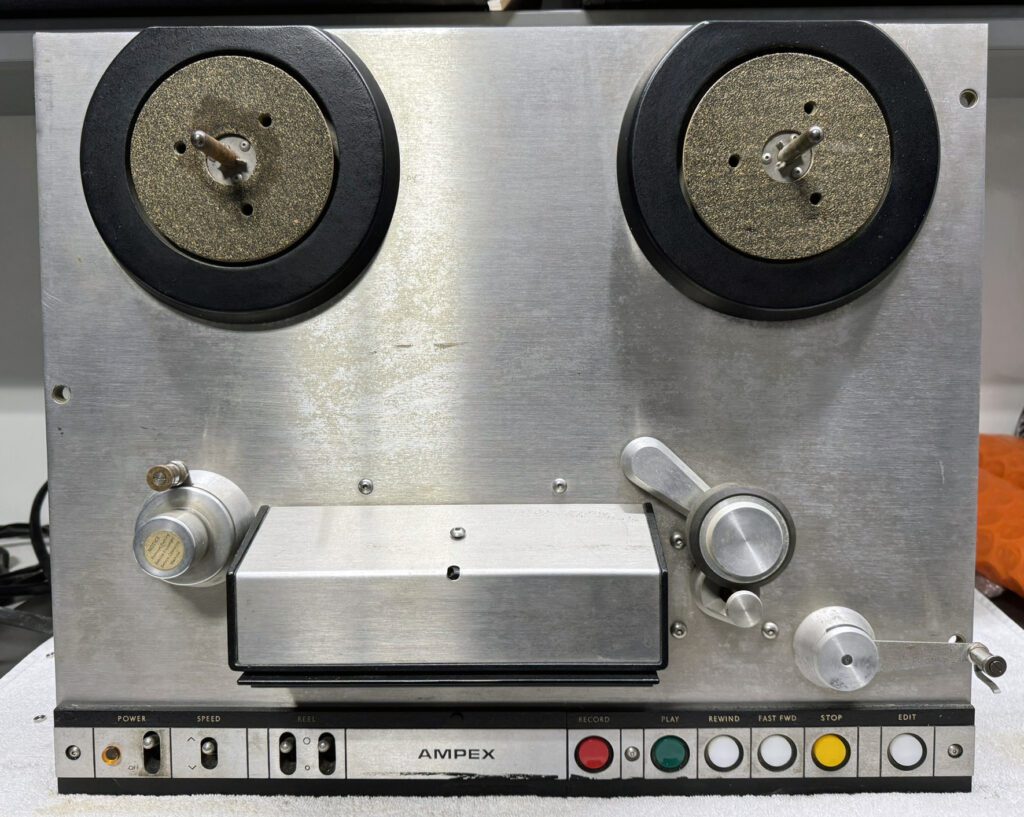
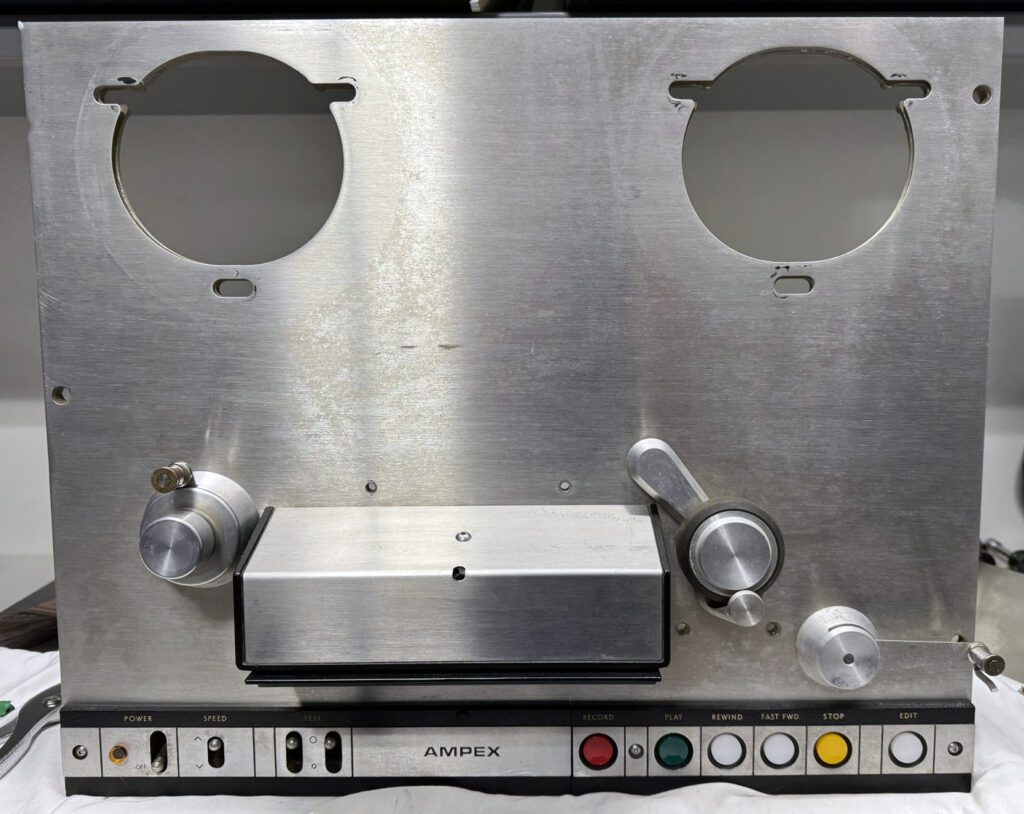
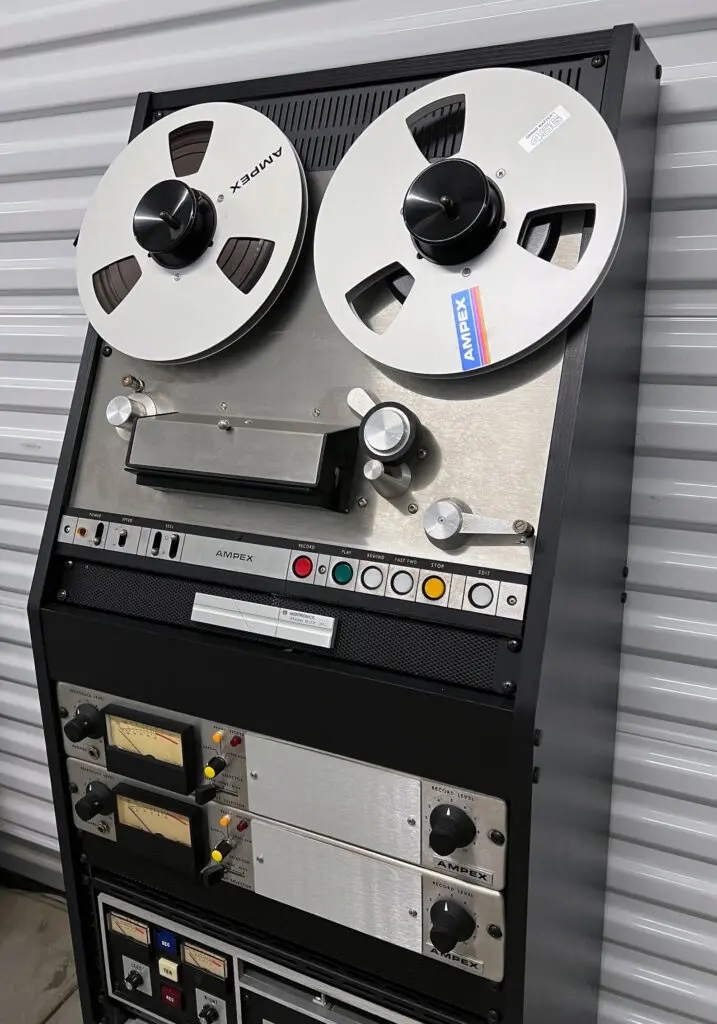
Ampex AG-440 Tape Deck
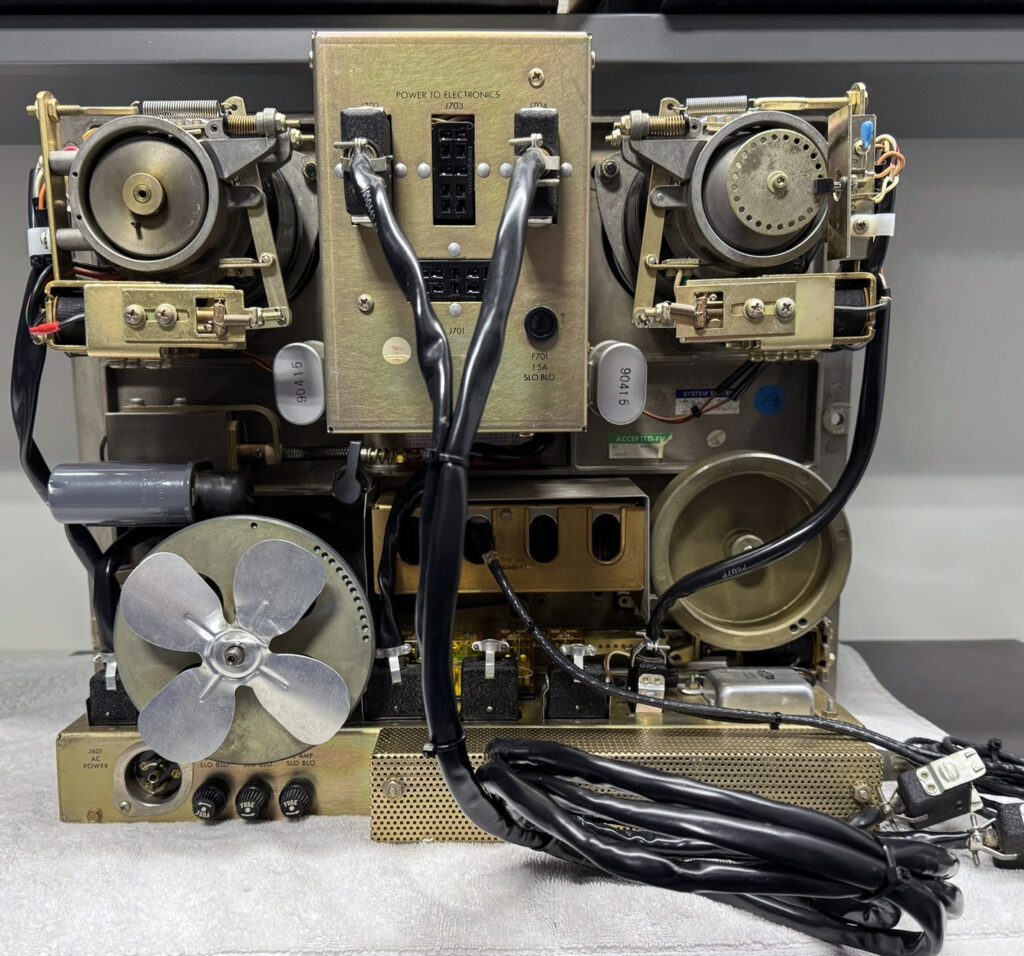
Rounding out the complement of hardware for the production room is an Ampex AG-440 reel-to-reel tape machine. The necessary elements of this machine—the deck assembly and a pair of preamplifiers—were purchased separately on eBay. The deck is shown below at the beginning of the project.
Having restored three of these machines, I had a good idea of what would be needed to bring this classic tape deck back to life. Details on the first AG-440 restoration are provided in the Ampex AG-440 Restoration Project blog.
As with any restoration, the first step is cleanup. The second step is compiling a list of parts likely to be needed as work moves forward.
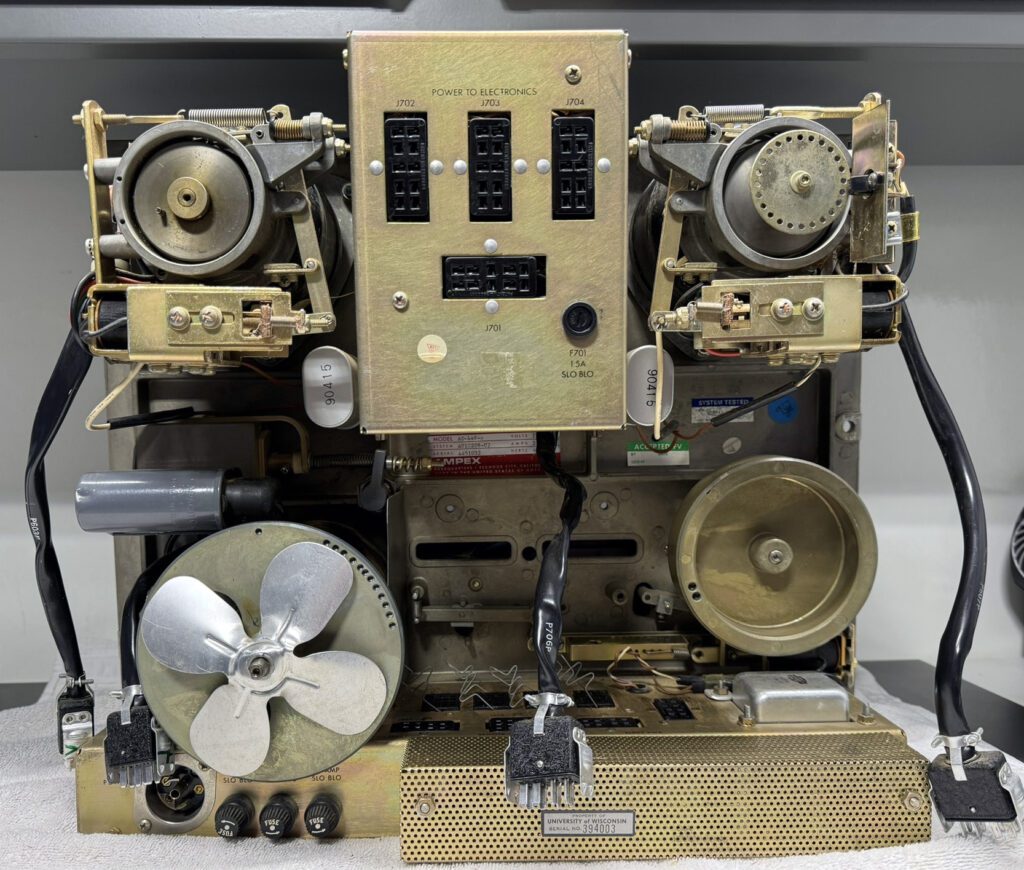
The tape deck had a large amount of dust covering the rear chassis. Not a big surprise, but still a pain to clean up. In order to clean and check all elements of the machine, substantial disassembly was required, as shown below.
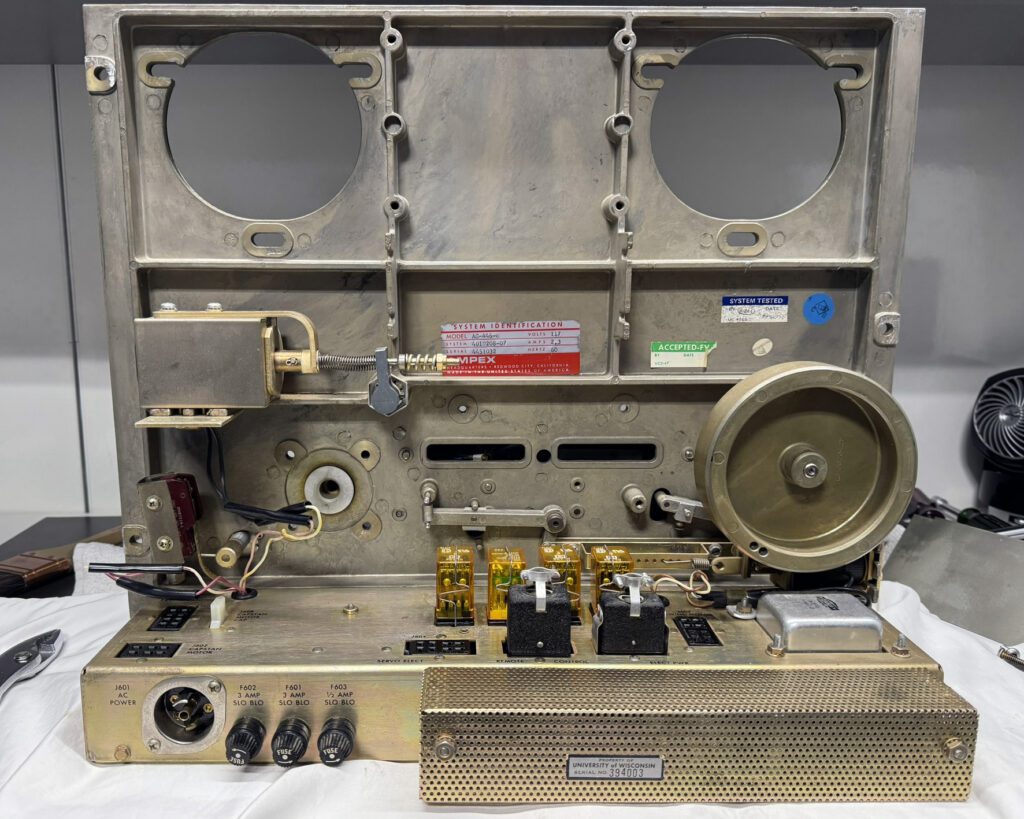
Fortunately, the AG-440 breaks down into major elements without too much effort. With the main subassemblies removed, a thorough cleaning of the front panel was possible. Most of the wear and stains could be removed, but not entirely. Still, the front panel is in acceptable condition.
After cleaning and inspection (and a few repairs) the tape deck was reassembled. Tests will come later. For now, I’m very pleased with the results.
The front of the machine is looking rather good now, as shown below. Note that the old cork reel turntable pads have been removed. New pads from Full Track Productions will be installed when they arrive. A new pinch roller has also been ordered from Full Track.

This tape deck has what is essentially a tachometer on the supply reel, as shown below. The purpose of the device is to indicate to the tape deck electronics when the reel has stopped. In the AG-440, when the machine is put in either the fast-forward or rewind mode, the tape is lifted off the heads in order to avoid tape wear and the very loud sound of the tape against the heads when moving at high speed.
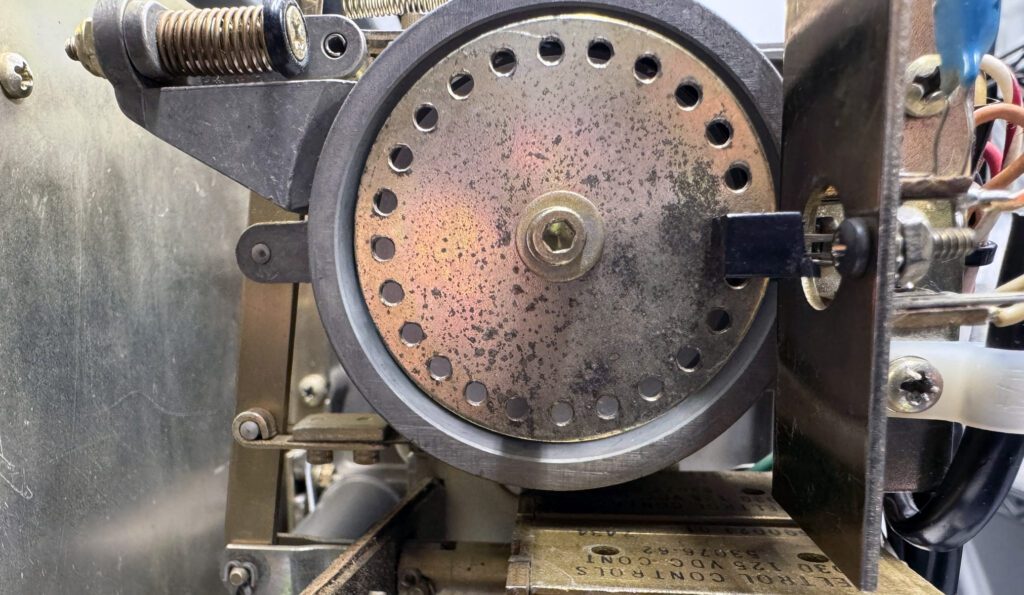
In early versions of the AG-440, the tape lifters were disengaged when the Stop button was pressed. In later versions, the tape lifters were disengaged after a pre-determined delay, thus avoiding the wear and sound of the tape braking to a halt. In this version of the AG-440 (the chassis sticker says it is an AG-446-C), the tape lifters are disengaged when the tape has actually stopped. It’s a nice addition to the machine.
This machine did not include a power connector/cord when purchased. As detailed in the Ampex AG-440 Tape Machine Restoration blog, a replacement connector is available (Hubbell HBL7484). This machine, however, uses a slightly different power connector on the chassis. It was necessary, therefore, to change out the the ac input connector on the chassis. This part is available from Hubbell as “Twist-Locking Flanged Inlet, 15 A/250 VAC, Screw Terminal, Twist-Lock Series.” It is available from Allied Electronics (now “RS”) and probably elsewhere. It is identical to the original device except for the ground terminal, which is easily accommodated with a separate wire to chassis ground.
This machine also had an inoperative Edit mode switch. The switch has an unusual configuration, with one set or normally-closed contacts and one set of normally-open contacts. Fortunately, I was able to find a new replacement device, shown below.
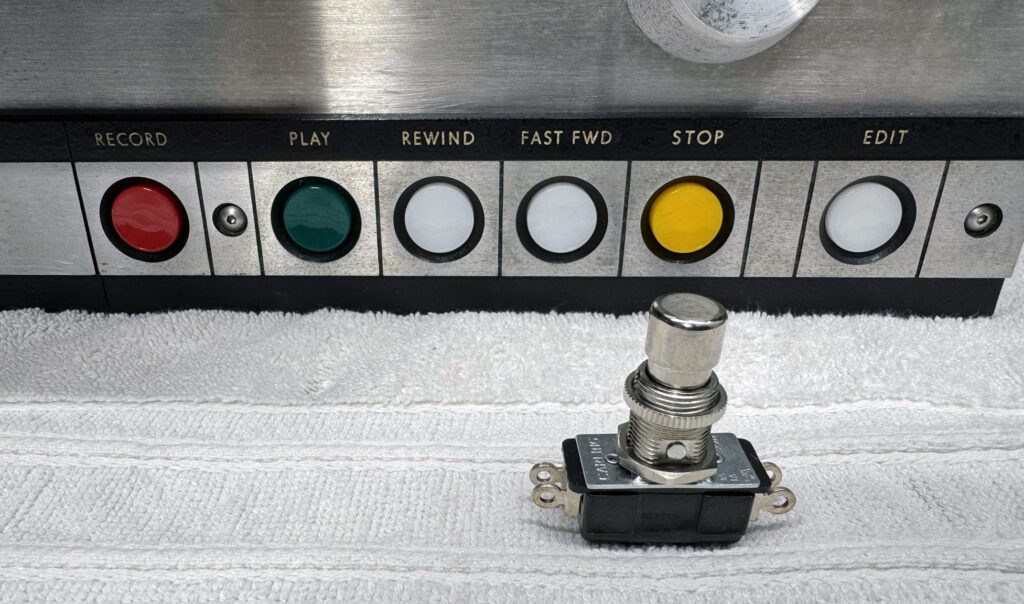
The replacement switch is a Carling Technologies 516-PM, available from Mouser Electronics (and possibly elsewhere). The device is a near-perfect replacement for the original. The only significant difference is tactile feedback when the button is pushed. In the original device, the action was smooth until it bottomed-out.
The other pushbutton switches on the front panel require different configurations. A catalog of the Carling Technologies 110-316P-Series switches is available from the Mouser website.
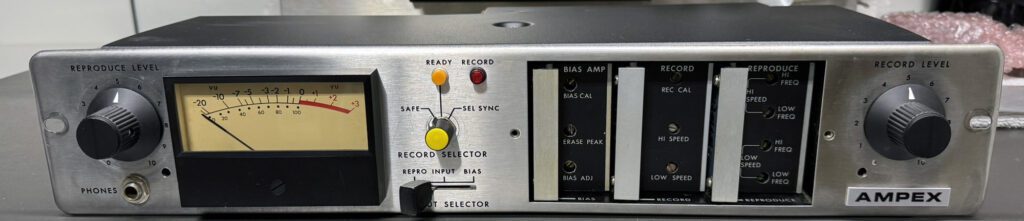
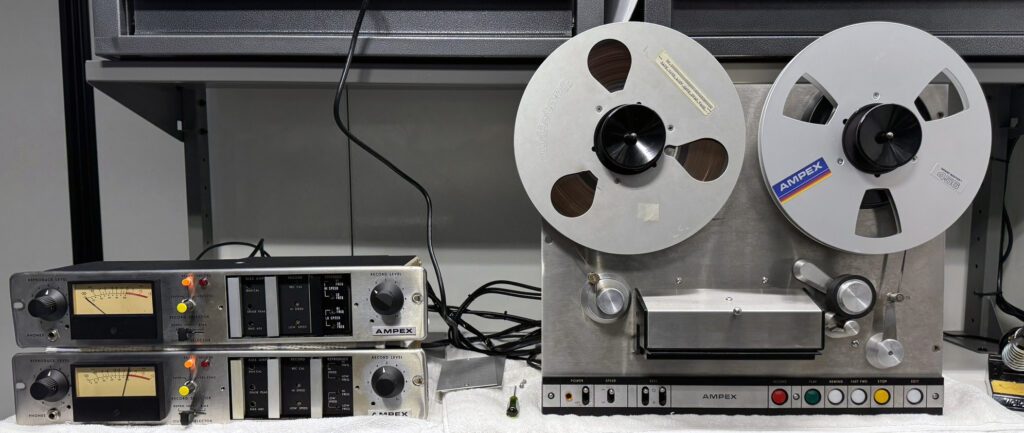
Ampex AG-440 Preamplifiers
The two AG-440 preamplifiers were in relative good shape when purchased on eBay. A through cleaning was about all that was required. Performance tests, which will be done later in the process, may reveal additional needed work. But for now, things look OK.
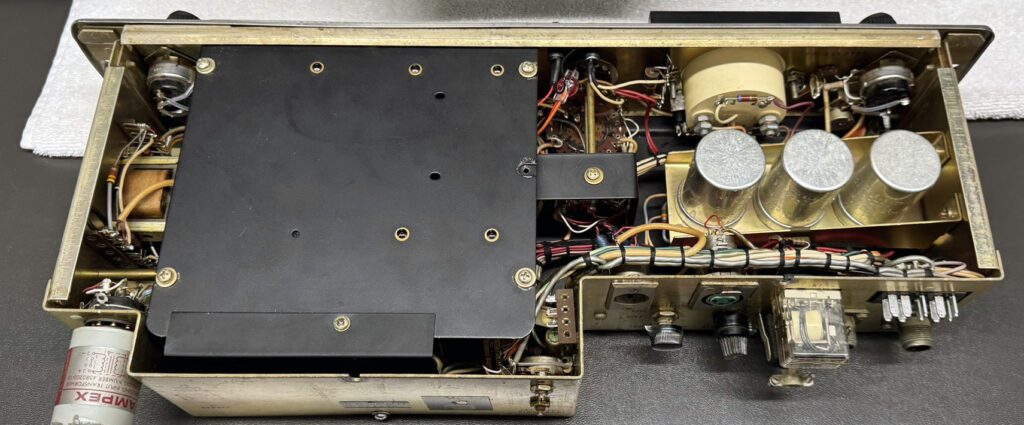
Spare cards are available for some of the boards used in the AG-440; they will be kept in reserve for use later if needed.
Fortunately, I have a selection of reference tapes for alignment of the heads and reproduce/record circuit boards. Without such tapes, interchangeability would be a hit-and-miss proposition.
Initial tests on the AG-440 system, shown below, were encouraging. Some issues were identified, but nothing major. The problems were identified and addressed, one-by-one.
The first power-up for any piece of vintage electronics is always a stressful situation. Fortunately, everything worked pretty much as expected.
Old School Editing
Old-timers will recall the process for editing reel-to-reel tapes. The tools were a splicing block, razor blade, and adhesive tape. Once the tape was cut, it was cut. No “undo” options here. Keeping with the 70s era theme of the production room, this “editing system” was acquired and is currently in use. While primitive by today’s standards, splice block editing is actually quick and efficient. And it does the job nicely.
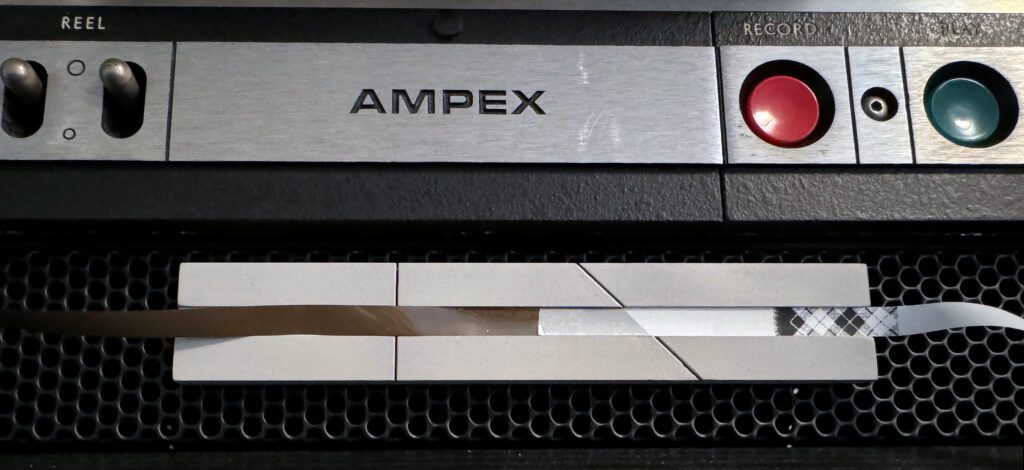
Old school…to be sure!
The equipment detailed above is installed in two assemblies—a desk unit for the Gates Executive audio console and an inclined rack for the other gear. This arrangement proved to be functional and at the same time efficiently house the hardware.
The production room is used to prepare elements for the 1970s studio, mostly recording music and spots on to tape cartridges and previewing pre-recorded reel-to-reel tapes. The facility functions well and completes the basic elements of a vintage radio station. All that is missing is a high-power transmitter. But that’s a discussion for another day…